Bitter melon, also known as bitter gourd or karela, is one of the healthiest vegetables you can grow at home. It’s rich in antioxidants, vitamins, and minerals, and it thrives even in small spaces. Surprisingly, you don’t need a garden or expensive supplies to grow it—just a simple sack and the kitchen waste you already throw away every day!
This easy, low-cost method is becoming popular around the world because it turns waste into powerful organic fertilizer while giving you lush, productive bitter melon vines. Whether you live in an apartment, a tiny house, or have limited backyard space, this technique allows you to grow fresh, chemical-free bitter melons right at home.
Let’s dive into the complete process!
🌱 Why Grow Bitter Melon in a Sack?
Using a sack for gardening—often called “sack gardening”—offers several powerful benefits:
✔ Saves space
You can grow vertically even in tight areas like balconies or terraces.
✔ No need for expensive pots or soil
The sack is cheap; kitchen waste creates rich compost naturally.
✔ Better drainage
Sacks allow excellent airflow and prevent waterlogging.
✔ Strong root system
The sack’s depth encourages stronger roots, which means more fruits.
✔ Easy to move
Lightweight and portable, you can shift it for sunlight anytime.
This simple setup creates the perfect growing environment for bitter melon.

🥬 Materials You Need
You don’t need anything fancy. Here’s all it takes:
- 1 large sack (jute, rice sack, or feed bag)
- A small amount of soil or coco peat
- Daily kitchen waste (vegetable peels, fruit scraps, eggshells, tea leaves)
- A handful of compost (optional but helpful)
- Bitter melon seeds
- A small trellis, sticks, or ropes for climbing
- Water
That’s it!
🌿 Step-by-Step Method to Grow Bitter Melon in a Sack
1. Prepare the Sack
Choose a medium or large-size sack. Jute sacks are best because they breathe well, but plastic woven rice sacks also work.
✔ Make drainage holes
If your sack is plastic, poke several holes on the bottom and sides for drainage.
✔ Roll the edges
Roll the top 4–6 inches of the sack outward to create a firm, steady opening.
2. Add a Base Layer of Soil
Put a thin layer (2–3 inches) of loose soil, coco peat, or even dried leaves at the bottom.
This helps absorb moisture and prevent waste from spilling out.
3. Add Kitchen Waste Layer-by-Layer
This is the heart of the method!
Start filling the sack with alternating layers:
🍃 A. Kitchen Waste Layer
Add fruit peels, vegetable scraps, coffee grounds, eggshells, leftover rice, etc.
Avoid meat or oily items.
🌱 B. Thin Soil Layer
Sprinkle a small layer of soil or coco peat. This helps breakdown and prevents smell.

🌿 C. Repeat
Continue layering until the sack is almost 60–70% full.
✔ Optional: Add compost
A handful of compost or cow dung accelerates decomposition and boosts nutrients.
As the waste breaks down, the level will shrink naturally. This enriches the soil inside the sack over time, creating a nutrient powerhouse perfect for bitter melon.
4. Fill the Top With Soil Mix
Now add 6–8 inches of final growing soil at the top.
Ideal mixture:
- 50% loose garden soil
- 30% compost
- 20% coco peat or sand
This ensures good aeration for seedlings.
5. Soak and Prepare the Bitter Melon Seeds
For faster germination:
✔ Soak seeds in warm water for 6–8 hours
This softens the hard seed coat.
✔ Remove the outer shell (optional)
If you gently crack the outer coat, seeds sprout much faster.
6. Plant the Seeds
Make 3–4 holes, each 1–2 cm deep, on the top surface.
Drop one seed in each hole and cover lightly with soil.

Water gently.
7. Watering the Sack Garden
Bitter melon loves consistent moisture but hates soggy roots.
💧 Watering guide:
- For first 7 days: Water lightly daily
- After sprouting: Water every 2–3 days
- Hot weather: Check moisture daily
The sack drains excess water automatically, so the roots remain healthy.
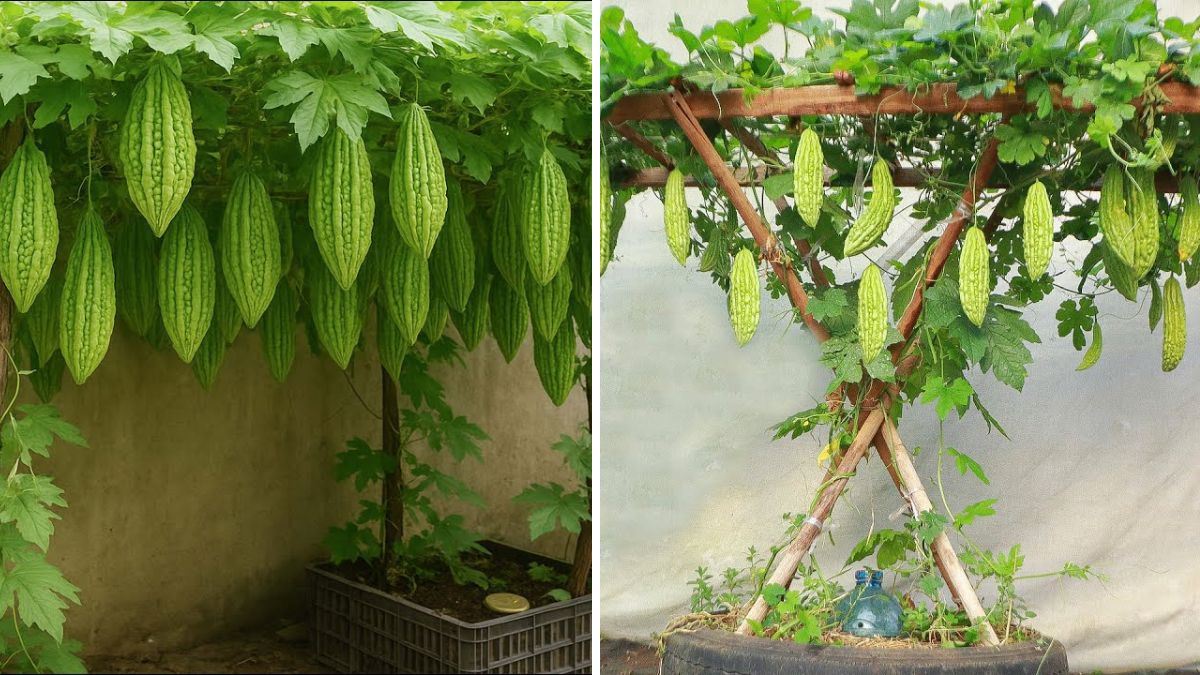
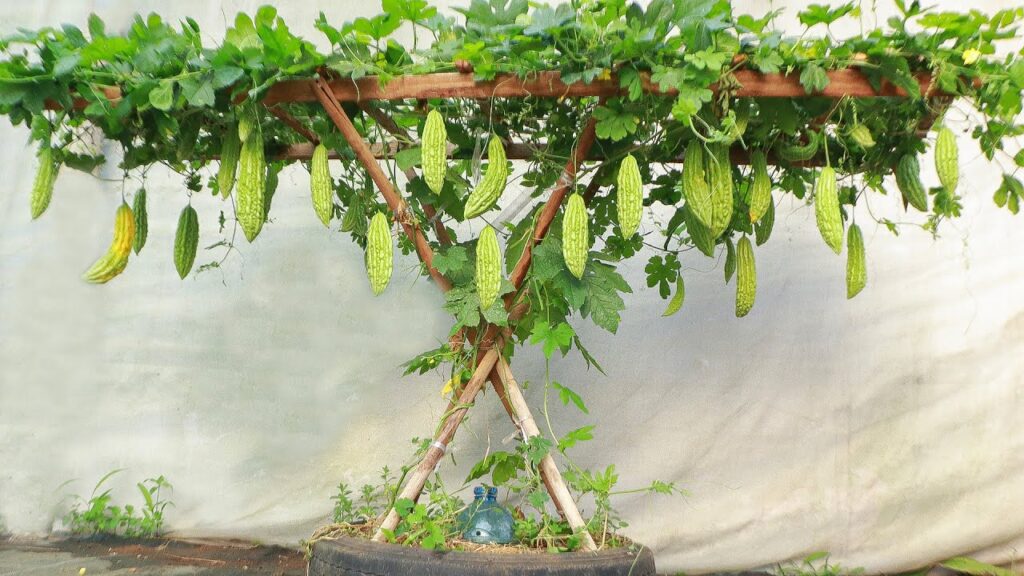
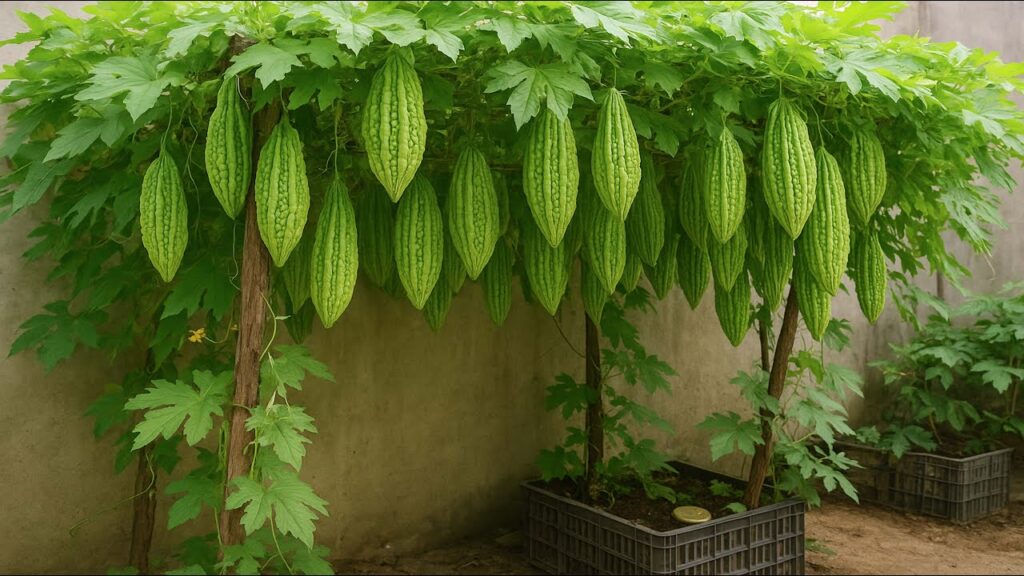
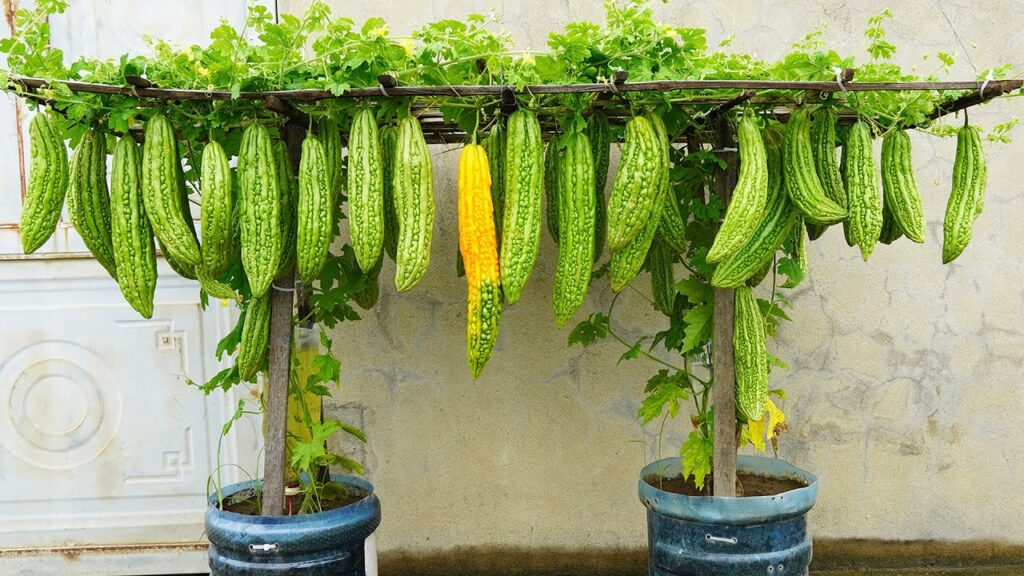
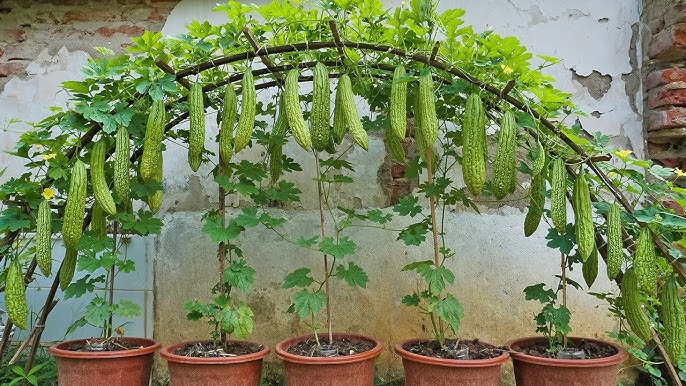
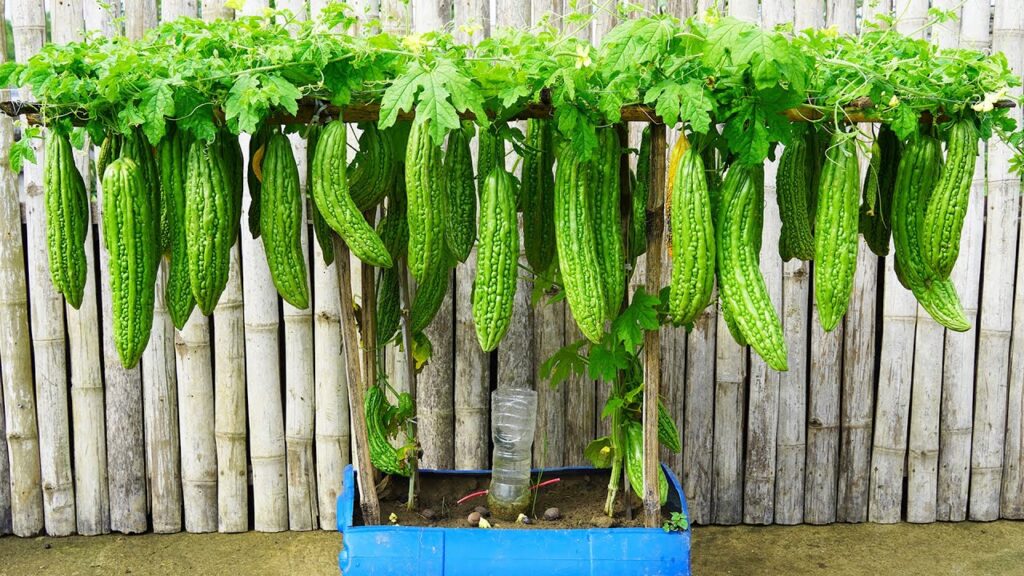
8. Provide Support for Climbing
Bitter melon is a vigorous climber.
Install any of the following:
- Rope tied to balcony railings
- Wooden/bamboo sticks
- Mesh or net
- Fence or railing
Train the vines upward as they grow. This ensures:
- Better airflow
- More flowering
- Cleaner fruits
- No rot from touching wet soil
🌞 Sunlight Requirements
Bitter melon thrives in bright sunlight.
✔ Best: 5–7 hours of direct sun
✔ Minimum: 4 hours
If sunlight is limited, place the sack where morning sun is available.
🌿 Feeding and Fertilizing
Your sack already has decomposing kitchen waste, which acts as slow-release fertilizer.
But for extra growth and more fruits:
✨ Every 10–15 days:
Use any of these:

- Compost tea
- Banana peel fertilizer
- Diluted cow dung or chicken manure water
- Seaweed solution
This boosts flowering and fruiting significantly.
🌸 Flowering and Fruit Development
Bitter melon produces male and female flowers.
Female flowers have a tiny fruit behind them.
To encourage more female flowers:
✔ Keep the soil evenly moist
✔ Give plenty of sunlight
✔ Feed potassium-rich fertilizers (banana peel water works great!)
You’ll start seeing baby bitter melons within weeks.
🍈 Harvesting Your Bitter Melons
Bitter melon grows fast in sack gardening.
⏳ Harvest time:
45–60 days after planting.
Harvest when:
- Fruits are firm
- Green (not turning yellow)
- 10–15 cm long depending on variety
Pick regularly to encourage new fruits.
💡 Extra Tips for Success
✔ Cut the growing tip after the vine reaches 5–6 feet
This encourages side branches, leading to more fruits.
✔ Add a handful of soil every 3–4 weeks
Kitchen waste decomposes and shrinks—refill to maintain soil level.

✔ Keep pests away naturally
Spray neem oil every 15 days to prevent aphids or fruit flies.
✔ Don’t overfeed with nitrogen
Too much leafy growth reduces fruit production.
🌿 Why This Method Is So Powerful
This simple system creates a perfect growing cycle:
Kitchen waste → Turns into compost
Compost → Feeds the soil
Soil → Feeds the vine
Vine → Produces fresh, organic bitter melon
It uses materials you already have at home, saves money, reduces waste, and produces healthy vegetables for your family.
🌱 Final Thoughts: A No-Cost Garden That Produces Abundantly
Growing bitter melon with just a sack and kitchen waste is not only smart—it’s incredibly satisfying. You’re recycling waste, creating fertile soil, and producing fresh vegetables without spending money.
This method is perfect for:
- Urban balconies
- Small terraces
- Rooftops
- Tiny backyards
- Anyone who wants organic vegetables at home
Try this simple technique once, and you’ll be amazed at how well it works. Your sack garden will become a small but powerful source of fresh, homegrown food.