
Mulberry trees are among the most rewarding fruit trees you can grow at home. They grow fast, adapt to different climates, and produce delicious, nutrient-rich berries that children and adults love. But did you know that with grafting, you can take your mulberry growing to the next level?
Grafting isn’t just for expert gardeners—it’s a simple, highly effective technique that anyone can learn. With the right method, you can grow more fruit, speed up harvest time, and even combine different mulberry varieties on a single tree. Imagine picking white, red, and black mulberries from one trunk—grafting makes it possible!
In this 1200-word guide, you’ll learn everything you need to start grafting mulberries confidently and successfully, even if you’re a complete beginner.
🌱 What Is Mulberry Grafting and Why Is It So Powerful?
Grafting is a propagation method where you join a piece of a desired plant (called a scion) onto another tree’s root system (called a rootstock). When the two parts fuse, they grow as one plant.
✨ Benefits of Grafting Mulberry Trees
1. Faster fruit production
Instead of waiting 3–5 years from seed, grafted mulberries can fruit in as little as 1–2 years.
2. More fruit, better quality
Grafted trees produce consistent fruit size, sweeter berries, and heavier harvests.
3. Grow multiple varieties on one tree
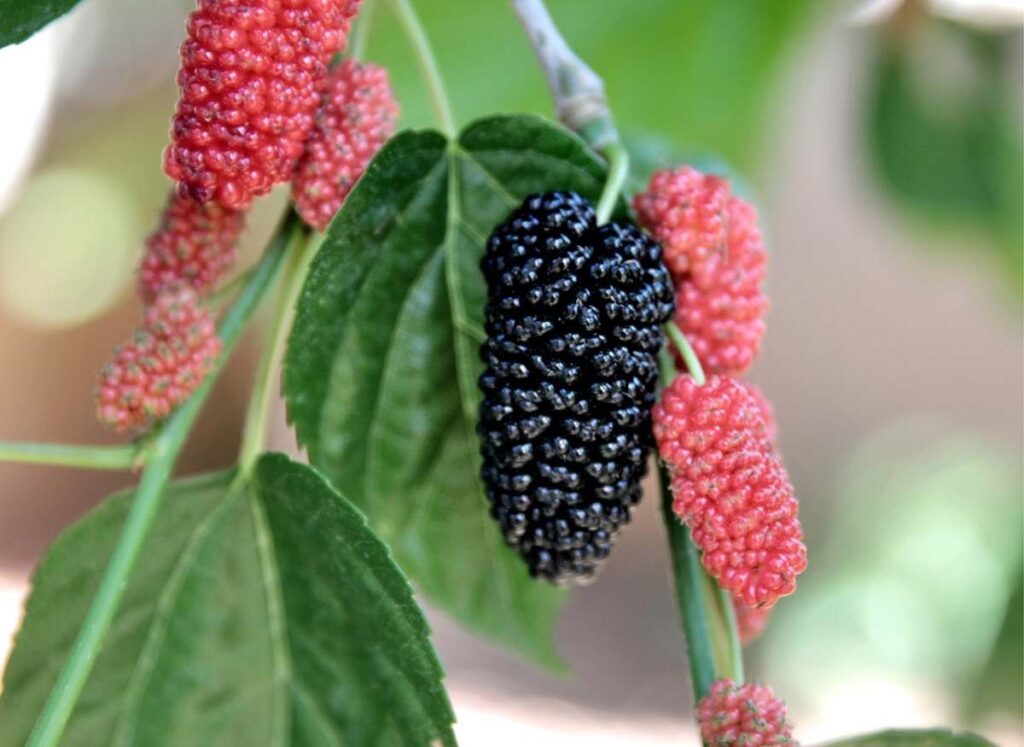
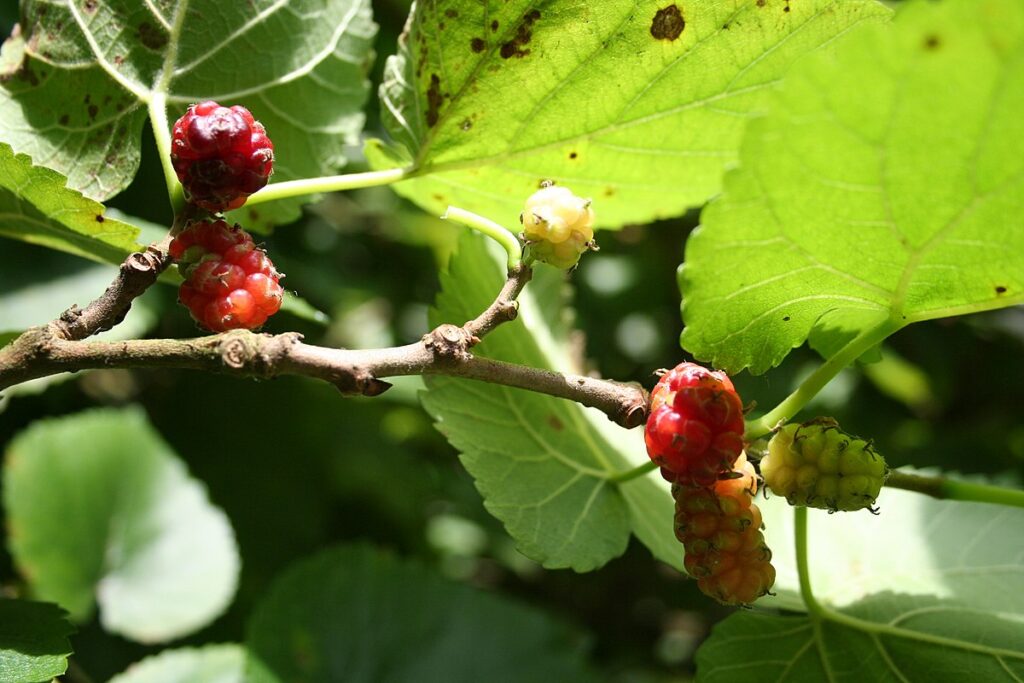
White (Morus alba), red (Morus rubra), black (Morus nigra)—all can grow on a single rootstock.
4. Control tree size
Dwarf or semi-dwarf rootstocks help you grow compact mulberry trees perfect for pots or small gardens.

5. Disease resistance & stronger plants
A hardy rootstock makes the tree more tolerant to poor soil, pests, and harsh climates.
🌳 Best Time to Graft Mulberries
Timing makes all the difference. For the highest success rate:
⏰ Ideal Season:
Late winter to early spring, just before new growth begins.
At this stage, the sap is starting to flow, helping the scion and rootstock fuse quickly.
Can you graft in summer?
Yes—but the success rate is lower. Summer grafting works best when using budding techniques.
🔧 Tools and Materials You Need

You don’t need anything expensive. Here’s the simple list:
- Sharp grafting knife or clean cutter
- Sterilizer (spirit, bleach solution, or sanitizer)
- Grafting tape or parafilm
- Rootstock (young mulberry tree 1–2 years old)
- Healthy scion wood (pencil-thick, disease-free)
- Pruning shears
- Label tags (optional but helpful)
Pro tip:
Sharp tools = clean cuts = better graft success.
🌿 Choosing the Right Rootstock and Scion

✔ Rootstock Tips
Select a mulberry rootstock that is:

- Healthy and disease-free
- 1–2 cm thick
- Well-established in soil
- Local and well-adapted
Native rootstocks give the best results because they are already acclimatized to your region.
✔ Scion Selection Tips
Choose scions that are:
- From a tree with proven good fruit quality
- 8–15 cm long
- Pencil-thick
- Dormant (if grafting in winter)
- Fresh—not dry or brittle
Always cut scions early in the morning for maximum moisture retention.
🔨 Most Effective Grafting Methods for Mulberry Trees
Mulberries graft extremely well, and several methods work beautifully. Below are the easiest and most reliable ways.
🌱 1. Cleft Graft (Best for Beginners)
This is the simplest method and perfect when your scion is thinner than the rootstock.
Steps
- Cut the rootstock horizontally at the height you prefer.
- Make a straight split 3–4 cm deep down the center.
- Shape the scion base into a wedge (V-shape).
- Insert the scion snugly into the slit—bark touching bark.
- Tape tightly to seal the graft.
- Apply grafting wax (optional).
Success Rate:
⭐⭐⭐⭐⭐
Excellent for mulberries!
🌿 2. Whip and Tongue Graft (Strongest Bond)
This is ideal when the rootstock and scion are the same thickness.
Steps
- Make a long slanting cut on both scion and rootstock.
- Make a small downward slit on each cut to create “tongues.”
- Interlock the two pieces.
- Wrap tightly with grafting tape.
- Seal the exposed cuts.
Why it works:
The large contact area leads to extremely strong graft unions.

🌳 3. Bark Graft (Perfect for bigger trees)
Use this when grafting onto thicker trunks or older trees.
Steps
- Cut the top of the rootstock flat.
- Make two vertical cuts through the bark.
- Peel the bark slightly and slide the scion behind it.
- Secure tightly with tape.
Great method for adding new varieties to old mulberry trees.
🌞 Care After Grafting: The Secret to 100% Success
Grafting doesn’t end when you wrap the joint. Post-graft care determines whether it thrives or fails.
👉 1. Keep the graft site sealed
Moisture loss kills scions. Wrap tightly with parafilm or tape.
👉 2. Provide shade
Young grafts can dry out in direct sunlight.
👉 3. Remove new shoots from rootstock
All energy must go to the scion—not the rootstock.
👉 4. Water regularly
Keep soil moist but not waterlogged.
👉 5. Support the graft
Tie the scion to a small stick if necessary to prevent wind breakage.

👉 6. Remove tape after 30–45 days
If the graft is swelling or tape is cutting in, remove it early.
🍇 How Long Before Grafted Mulberries Bear Fruit?
Mulberry trees are fast growers, but grafting speeds things up even more:
⏳ Expected fruiting time:
12–24 months after grafting.
Some vigorous varieties may fruit in less than a year!
🌈 Exciting Things You Can Do With Mulberry Grafting
Mulberries are highly compatible with grafting, which opens endless possibilities:
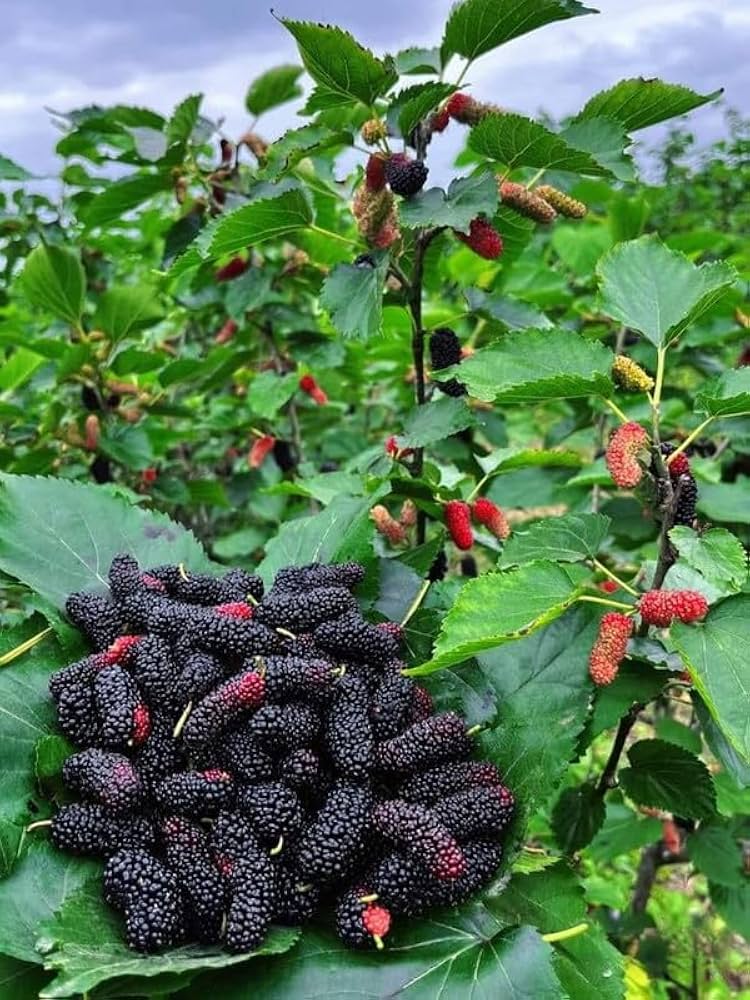
✔ Grow 3–5 varieties on a single tree
Different colors, sweetness levels, and fruiting seasons.
✔ Create dwarf mulberry plants for containers
Perfect for balconies or terraces.
✔ Revive an old, unproductive tree
Graft fruit-rich scions onto it.

✔ Make unique multi-color fruit trees
Imagine plucking black and white mulberries from the same branch!
🌟 Common Mistakes to Avoid
Even beginners can succeed easily if they avoid these pitfalls:
- Using dry or diseased scions
- Grafting during extreme heat or cold
- Not securing the graft tightly
- Allowing water to enter the graft union
- Cutting tools not sterilized
- Leaving competing shoots growing below the graft
Fix these, and your success rate will skyrocket.
🍇 Final Thoughts: Grafting Mulberries Is Easier Than You Think
Mulberry grafting might sound like a complicated technique, but in reality, it’s one of the easiest and most rewarding grafting practices. With simple tools, fresh scions, and the right method, you can create trees that grow faster, produce more fruit, and look incredibly unique.
Whether you’re grafting to increase yield, revive an old tree, or combine multiple varieties into one masterpiece—mulberry grafting gives you endless possibilities.
So grab your tools, pick your best scion, and transform your mulberry tree into a fruit-producing powerhouse!