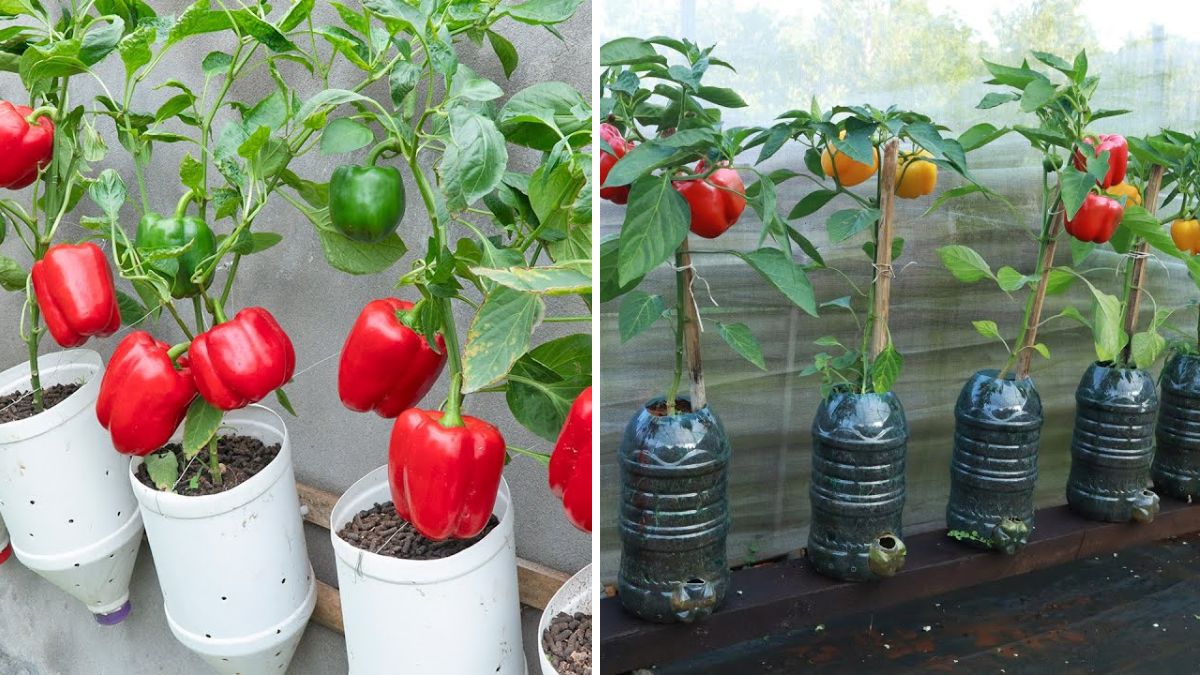
Peppers are one of the most rewarding vegetables to grow at home—they are colorful, nutritious, productive, and amazingly versatile in the kitchen. Whether you love sweet bell peppers, spicy chilies, or flavorful mini peppers, growing your own supply is both satisfying and economical. But what if you don’t have a garden, large pots, or much space?
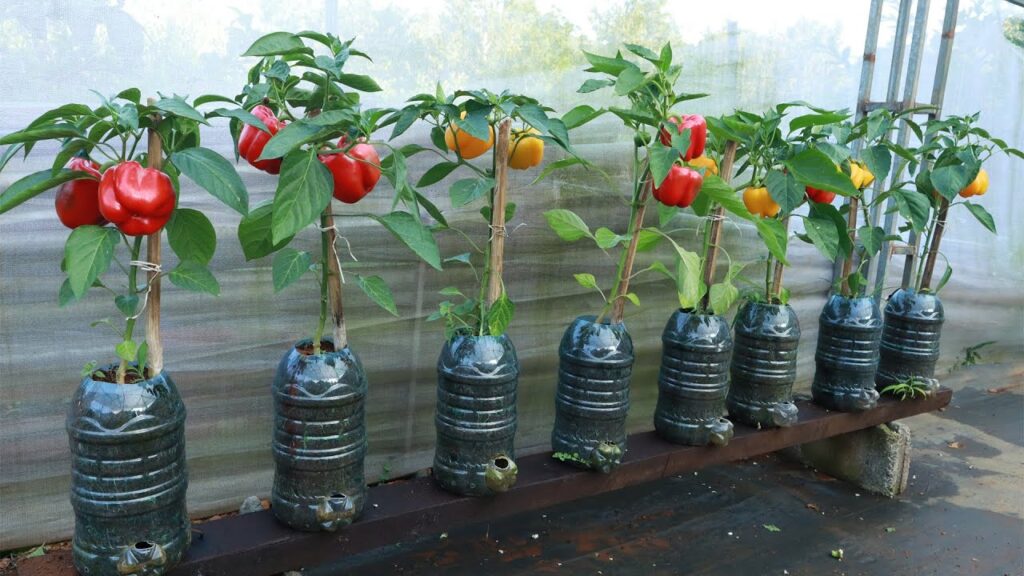
Good news: you can grow healthy, productive pepper plants using simple plastic bottles—the same bottles that usually get thrown away! This method is ideal for balconies, terraces, windowsills, kitchens, and even tiny outdoor spaces. It saves money, reduces waste, supports sustainability, and lets you enjoy homegrown peppers all year long.
In this detailed guide, you’ll learn how to grow thriving pepper plants in plastic bottles step-by-step, from seed to harvest—along with expert tips to maximize yield.
🌶️ Why Grow Peppers in Plastic Bottles?
Peppers are surprisingly adaptable plants. They don’t require deep soil, they love heat, and their compact size makes them perfect for container gardening. Plastic bottles, when used wisely, create a mini self-watering environment ideal for root growth and nutrient absorption.
Benefits of Using Plastic Bottles
- Eco-friendly – gives bottles a second life
- Space-saving – fits anywhere: balcony rails, windows, walls
- Budget-friendly – no need to buy pots
- Easy drainage – you control the hole placement
- Lightweight – easy to move to sunny spots
- Great for hydroponic-style watering
- Perfect for kids and beginners
Plus, peppers grown in plastic bottle planters often grow faster thanks to better heat retention.
🪴 Step 1: Choose the Right Bottle Size

Choosing the right bottle helps the pepper plant develop strong roots and grow taller.
Best Bottle Sizes
- 2-liter bottles for most pepper varieties
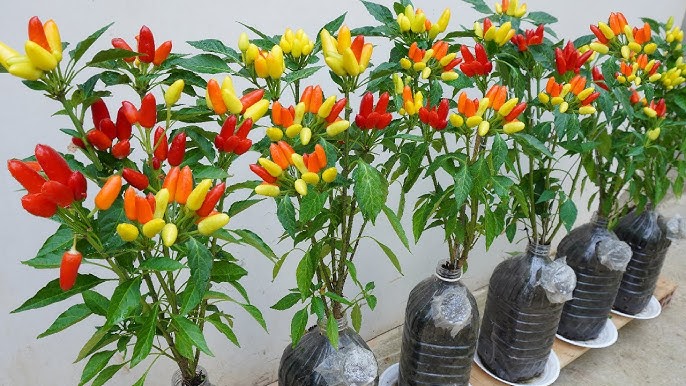
- 1-liter bottles for small chilies (like Thai chili or bird’s eye chili)
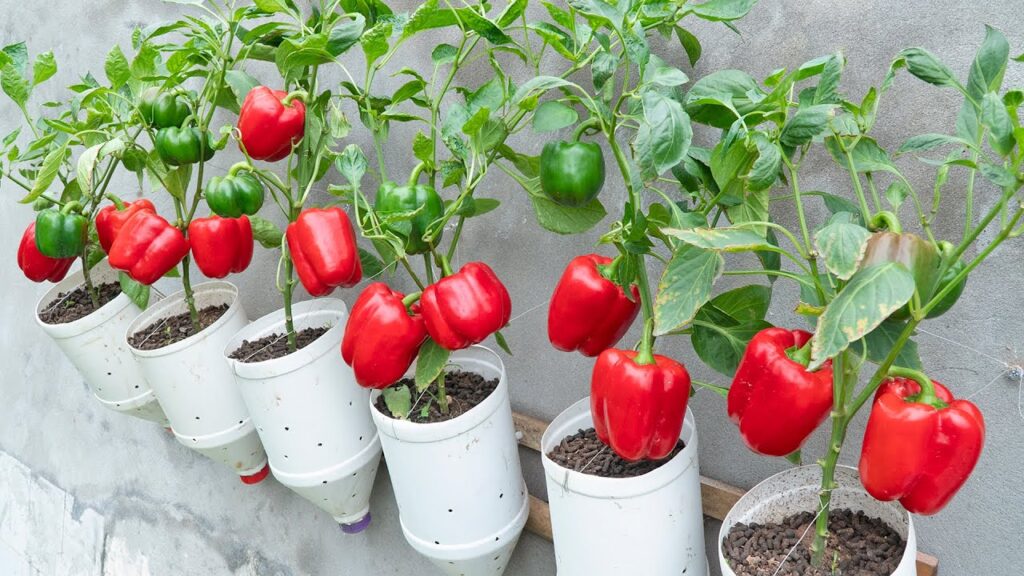
- 5-liter containers for large bell peppers or high-yield varieties
Peppers need at least 20–25 cm of soil depth for healthy root development.

✂️ Step 2: Prepare the Bottle for Planting
There are two effective ways to turn a bottle into a planter.
Method 1: Vertical Bottle Planter
- Cut off the top 10–12 cm.
- Make 8–10 drainage holes at the bottom.
- Create 2–3 side holes near the rim for airflow.
- Keep the bottle label-free to allow sunlight on the roots.
Method 2: Self-Watering Bottle
- Cut the bottle in half.
- Invert the top half like a funnel into the bottom half.
- Insert a cotton wick through the bottle’s mouth.
- Fill the bottom part with water.
- Fill the top with soil.
This creates an automatic irrigation system—perfect for busy gardeners!
🌱 Step 3: Prepare the Perfect Soil Mix
Peppers grow healthiest in light, airy, nutrient-rich soil.
Ideal Soil Mix
- 40% potting mix or cocopeat
- 40% compost or vermicompost
- 20% perlite or sand for better drainage
Optional Additives
- A handful of neem cake (prevents soil pests)
- 1 tablespoon bone meal (root booster)
- A pinch of Epsom salt (improves leaf color and fruiting)
Avoid clay-heavy soil—it retains too much water and suffocates roots.
🌶️ Step 4: Choosing Pepper Seeds or Seedlings
You can grow peppers from:
- Seeds saved from fresh peppers
- Store-bought seed packets
- Nursery-bought seedlings
Best Varieties for Bottle Growing
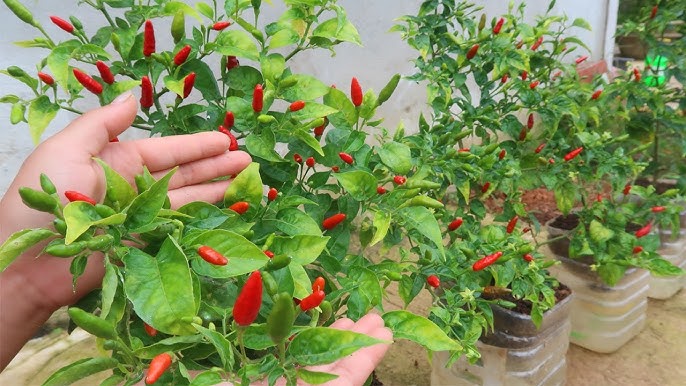
- Bird’s eye chili
- Cayenne
- Jalapeño
- Tabasco
- Banana peppers
- Shishito peppers
- Small bell peppers
Large bell pepper varieties require bigger bottles or mini-grow bags.
🌱 Step 5: Planting the Seeds
How to Plant
- Fill the bottle with soil up to the brim.
- Make 1 cm deep holes using your finger.
- Place 2 seeds in each hole.
- Cover lightly with soil.
- Mist with water.
Seeds germinate in 7–14 days, depending on temperature.

Once seedlings grow 10 cm tall, thin to one plant per bottle.
☀️ Step 6: Provide the Right Sunlight
Peppers love heat and light. The more sun they get, the more fruits they produce.
Sunlight Requirements
- 6–8 hours of direct sunlight daily
- Warm conditions (24–35°C)
- Avoid cold nights
Place your bottles:
- On a balcony
- Near a south-facing window
- On a rooftop
- Hanging on a railing
The transparent bottle warms up the soil, boosting root growth and fruiting.
💧 Step 7: Watering the Right Way
Watering is one of the most important elements of successful pepper growing.
For Regular Bottle Planters
- Water every 2–3 days in warm weather
- Check moisture by touching the soil
- Avoid overwatering (leads to root rot)
For Self-Watering Bottles
- Refill the water reservoir once every 5–7 days
- Change water completely every 2 weeks
- Ensure wick is always moist
Consistent watering = healthier plants, bigger peppers.
🍌 Step 8: Feeding Your Pepper Plants
Peppers are heavy feeders because they produce many fruits.

Organic Fertilizers to Use
- Vermicompost (every 2–3 weeks)
- Banana peel water (potassium booster)
- Seaweed extract (once a month)
- Compost tea
- Fish emulsion
For Flower Boosting
Use a phosphorus-rich fertilizer when the plant begins flowering.
Fertilize lightly—plastic bottles hold less soil, so compost works best.
🌼 Step 9: Flowering and Fruit Setting
Peppers usually start flowering in 45–60 days.
To Encourage Fruit Set
- Keep the plant in full sun
- Avoid overwatering
- Shake the plant gently to help pollination
- Add potassium-rich fertilizer
- Ensure good airflow around bottle
If flowers fall off, don’t worry—it’s common in hot or humid weather.
🐛 Step 10: Protecting Peppers from Pests
Plastic bottles reduce many pests because they elevate the plant and improve airflow. However, some insects may still appear.
Common Pepper Pests
- Aphids
- Whiteflies
- Spider mites
- Caterpillars
Organic Control Methods
- Neem oil spray (every 10–15 days)
- Soap + water spray
- Garlic-chili spray
- Manual removal of caterpillars
Healthy plants in light soil rarely suffer major pest issues.
🌶️ Step 11: Harvesting Your Peppers
Peppers are ready to harvest when:

- Green peppers reach full size
- Chilies turn red, yellow, or orange
- The skin becomes firm and shiny
How to Harvest
- Use scissors or a sharp knife
- Do not pull the pepper—it may damage the plant
- Harvest regularly to encourage new growth
Peppers grown in bottles often produce continuously for several months.
🔄 Step 12: Extend Your Pepper Plant’s Life
Pepper plants can last 2–3 years in warm climates.
To keep the plant productive:
- Trim dry stems
- Add fresh compost every month
- Replace topsoil twice a year
- Move indoors during winter
- Add mulch to keep roots warm
With good care, one bottle-grown pepper plant can yield over 50–100 peppers yearly.
🌟 Pro Tips for Growing Large, Healthy Peppers in Bottles
🌶️ Choose compact pepper varieties
🌶️ Use self-watering bottles for less maintenance
🌶️ Place bottles in full sun
🌶️ Don’t overcrowd with multiple plants per bottle
🌶️ Add mulch to prevent soil from overheating
🌶️ Use Epsom salt once a month for greener leaves
🌶️ Pinch early flowers to strengthen the plant
🌶️ Support tall varieties with a small stick
Follow these tips and your tiny garden will explode with color and flavor!
🌿 Final Thoughts
Growing peppers in plastic bottles is a simple, eco-friendly, and surprisingly productive method that anyone can try. With just a few bottles, some seeds, and basic care, you can enjoy a continuous supply of fresh peppers—whether you live in an apartment, a tiny home, or a large garden.
This sustainable gardening technique helps you recycle plastic, save space, reduce waste, and grow organic, chemical-free peppers right at home.

Start today with a single bottle, and you’ll soon discover how easy, fun, and rewarding growing peppers in plastic bottles can be!