Growing your own vegetables is one of the most satisfying experiences for any home gardener. But what if you don’t have open land? What if the only space you own is your rooftop? Here’s the good news—okra (also known as lady’s finger or bhindi) is one of the easiest and most reliable crops you can grow on a rooftop with minimal tools, minimal soil, and maximum harvest. With just a few containers, sunlight, and the right methods, you can enjoy fresh, chemical-free okra right at home.
This 1200-word guide will walk you through everything you need to know: from choosing containers to soil preparation, planting, fertilizing, pest control, and harvesting. Let’s turn your rooftop into a productive mini-farm!
Why Okra is Perfect for Rooftop Gardening

Okra is a heat-loving, sun-craving vegetable—precisely the conditions a rooftop naturally provides. Here’s why it’s ideal:
- 🌞 Thrives in full sunlight (6–8 hours daily)
- 🪴 Grows well in containers of 12–16 inches
- ⚡ Fast-growing crop—first harvest in 45–55 days
- 💪 Minimal disease pressure compared to other vegetables
- 🌧️ Tolerates heat and dry conditions well
- 🌱 Continuous fruiting once harvesting begins
If you’re a beginner, okra will give you confidence and early success.
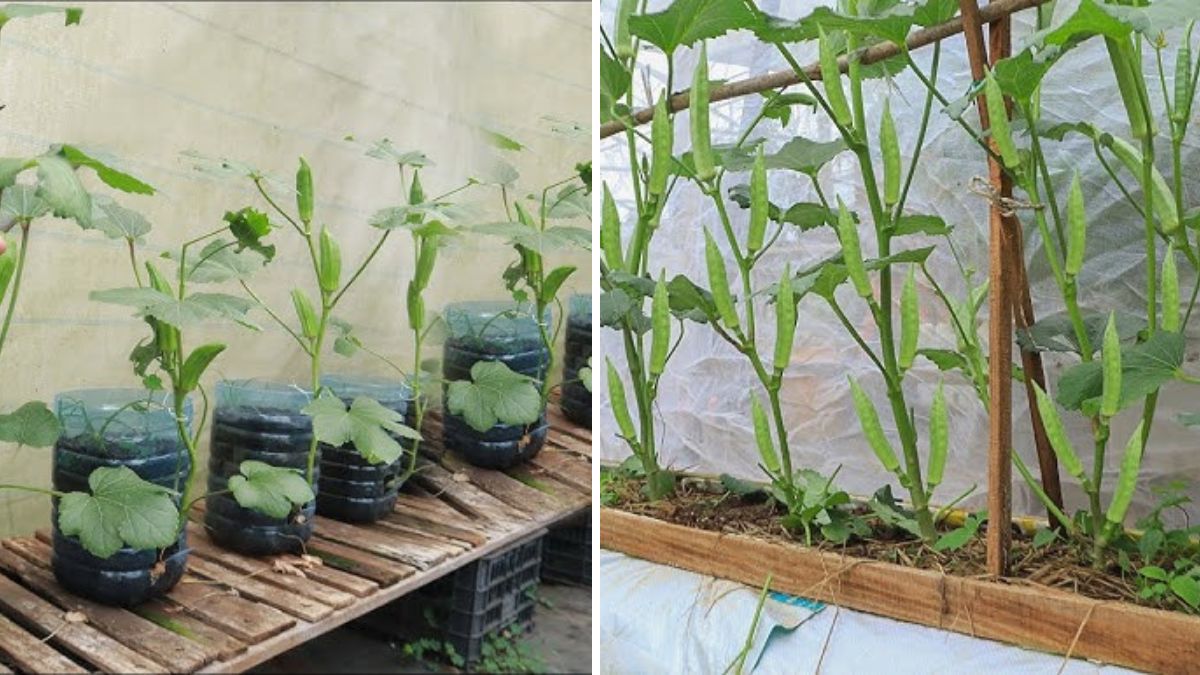
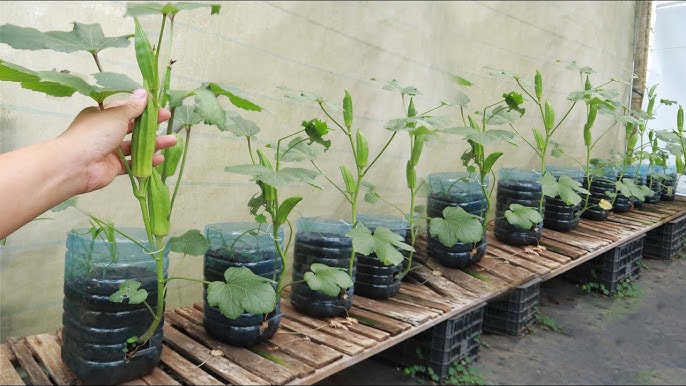
Step 1: Selecting the Right Container
Rooftop gardens depend heavily on container choice. For okra:
Recommended Container Size
- Minimum 12 inches deep
- Width: 12–16 inches
- Material: plastic pots, grow bags, recycled buckets, or paint tubs
- Drainage: Must have 4–6 holes at the bottom
Grow Bags are the Best Choice
Grow bags are breathable, lightweight, root-friendly, and perfect for rooftops. A 15–20 L grow bag is ideal for one okra plant.

Step 2: Preparing the Perfect Soil Mix
Okra loves loose, fertile, well-draining soil. Avoid heavy clay mixes.
Ideal Rooftop Soil Mix (Loose & Fertile)
- 40% garden soil
- 30% compost (vermicompost or cow dung)
- 20% cocopeat for moisture balance
- 10% sand for drainage
Add Natural Boosters
- A handful of neem cake powder (pest protection)
- 1 tablespoon bone meal or rock phosphate (for flowering)
Mix everything thoroughly and fill your containers 4/5 full.
Step 3: Choosing and Planting Okra Seeds
Okra seeds have a hard coat. For fast germination:
Seed Preparation
- Soak seeds in warm water for 4–6 hours
or - Keep seeds wrapped in wet tissue overnight
This makes sprouting faster and more uniform.
Planting Method
- Make 1-inch deep holes
- Plant 1–2 seeds per hole
- Cover with light soil
- Water gently
Within 3–6 days, you’ll see the first signs of life.
Step 4: Watering Routine for Rooftop Okra
Rooftops get hot quickly, so water management is essential.

Watering Tips
- Keep soil moist, not soggy
- Water once daily during summer mornings
- In monsoons, reduce watering
- Mulch with dry leaves or straw to prevent water evaporation
Okra roots don’t like standing water—ensure good drainage.
Step 5: Sunlight Requirements
Okra loves the sun. Place your pots where they receive:
- 6–8 hours of daily sunlight
- East or south-facing areas are ideal
The more sun okra gets, the more it flowers and produces.
Step 6: Fertilizing Okra for Heavy Harvest
To get long, tender, abundant okra pods, feed the plants regularly.
At Planting Time
- Mix compost into the soil
After 20 Days
- Add 2 handfuls of vermicompost
- Sprinkle 1 tbsp neem cake
During Flowering & Fruiting

Feed every 15 days with:
- Banana peel fertilizer
- Seaweed solution
- Compost tea
- Mustard cake liquid
Organic fertilizers produce healthier pods and a better-tasting harvest.

Step 7: Supporting Your Rooftop Okra Plants
Once plants reach 2 feet height, they may lean due to wind.
Provide Support
Use:
- Bamboo sticks
- Wooden stakes
- Garden ties
Tie loosely so stems can still move and grow.
Step 8: Pest Control — Naturally
Okra is generally hardy, but rooftop heat can invite pests like:
- Aphids
- Whiteflies
- Mealybugs
- Caterpillars
Organic Pest Spray
Mix:
- 1 litre water
- 1 tsp neem oil
- 1 tsp liquid soap
Spray every 7 days during early morning or evening.
Also, prune yellow leaves to keep plants healthy.

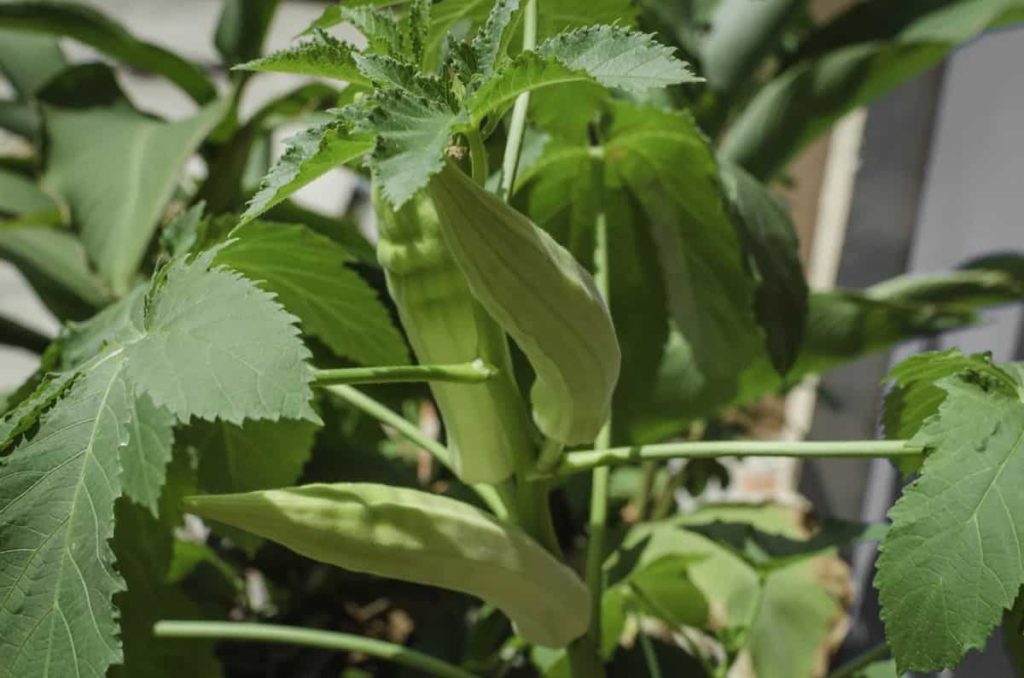
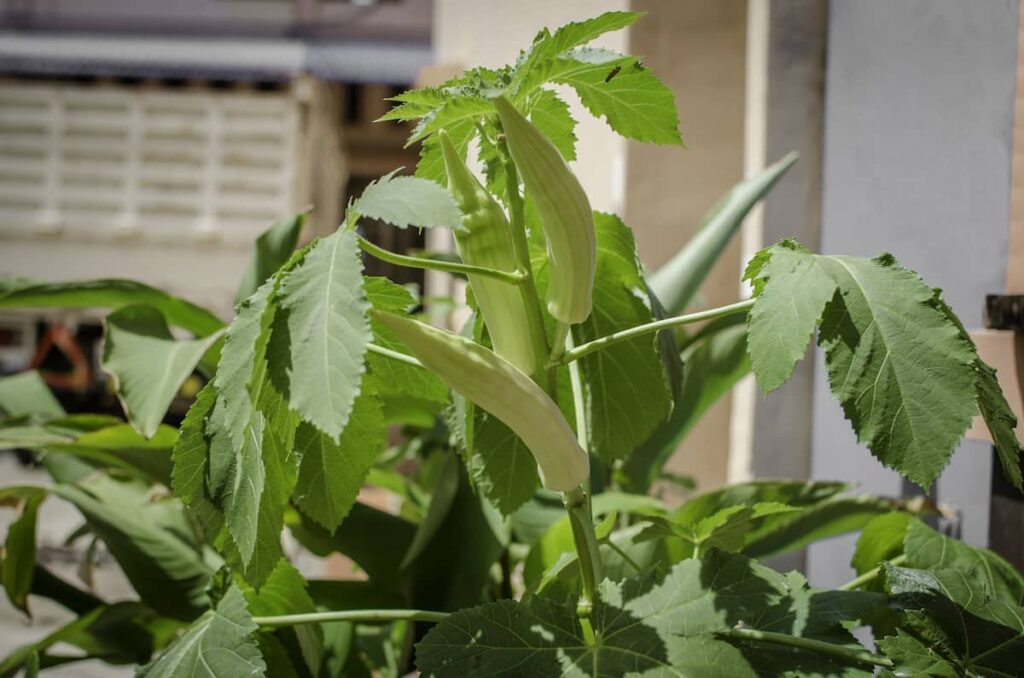
Step 9: When and How to Harvest Rooftop Okra
Okra grows fast! Once flowering begins, pods appear in 3–4 days.
Signs Okra is Ready
- Length: 3–5 inches
- Bright green
- Soft and tender when pressed
Harvesting Tips
- Pick every 1–2 days
- Don’t wait too long—mature pods become woody
- Wear gloves, as okra stems can be prickly
Regular picking encourages more flowering and continuous yield.
Step 10: Extending Your Rooftop Harvest
To keep okra productive:
- Remove old pods
- Add compost every 3 weeks
- Keep soil moist
- Pinch growing tips at 2–3 feet height to encourage side branches
Side branches mean double the harvest!
Common Mistakes to Avoid
❌ Overwatering
❌ Shallow containers
❌ Insufficient sunlight
❌ Adding chemical fertilizers that burn roots
❌ Ignoring pruning
❌ Harvesting late
Avoiding these will ensure a healthy rooftop okra garden.

Final Thoughts
Growing okra on your rooftop is not only easy but incredibly rewarding. With minimal effort and space, you can enjoy pesticide-free, tender, home-grown lady’s finger throughout the season. The process is simple, cost-effective, and perfect for anyone—from complete beginners to experienced home gardeners.
Your rooftop can become a productive, green oasis with fresh vegetables just a step away from your kitchen. Start with one plant, follow the steps above, and soon you’ll be harvesting baskets of fresh okra grown with your own hands.