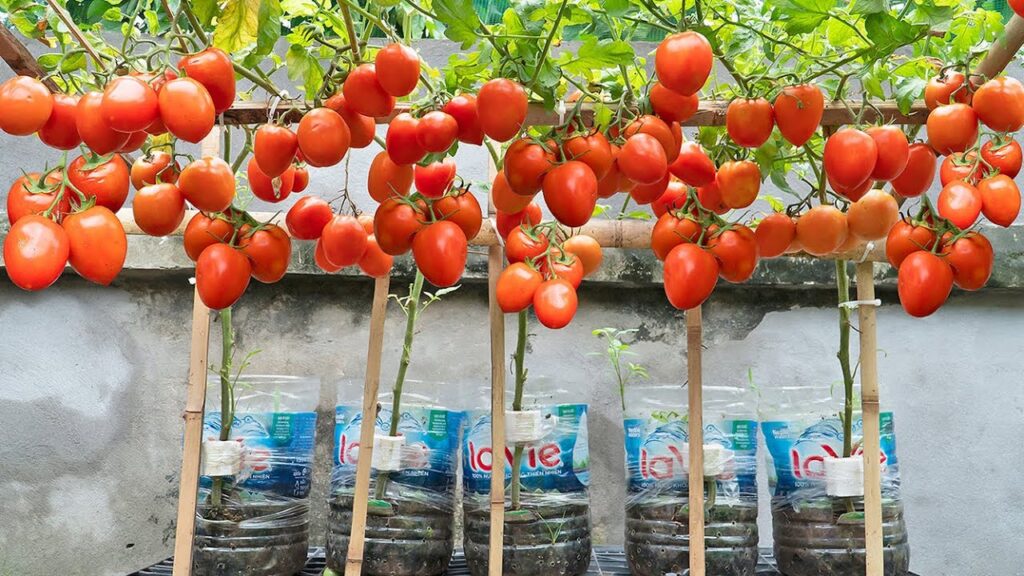
Growing tomatoes doesn’t require a big garden, expensive pots, or fancy tools. In fact, one of the easiest, cheapest, and most space-saving ways to grow tomatoes is by using a simple plastic bottle. Whether you live in an apartment, have a tiny balcony, or want to try something unique and fun, bottle gardening is perfect for you.
This guide will show you step-by-step how to grow healthy, productive tomato plants in plastic bottles, from choosing the right bottle and soil mix to fertilizing, watering, and harvesting. With the right method, you can enjoy fresh, homegrown tomatoes all year!
🌿 Why Grow Tomatoes in a Plastic Bottle?

Growing tomatoes in plastic bottles isn’t just convenient—it offers several real advantages:
✔ Low Cost
You can reuse old plastic bottles instead of buying pots.
✔ Perfect for Small Spaces
Great for balconies, windowsills, terraces, or kitchen gardens.
✔ Root Visibility
Transparent bottles make it easy to check root health and moisture.
✔ Water-Efficient
You can convert the bottle into a self-watering container.
✔ Sustainable Gardening
It reduces plastic waste and promotes eco-friendly gardening.

🥤 What You Need to Get Started
Here’s a simple list of what you will need:
- 1 large 2–5 litre plastic bottle
- Tomato seeds or seedlings
- Sharp knife or scissors
- Good-quality potting soil
- Organic manure/compost
- Cocopeat (optional but recommended)
- Small stones or gravel
- Watering can or spray
- Liquid fertilizer (homemade or store-bought)
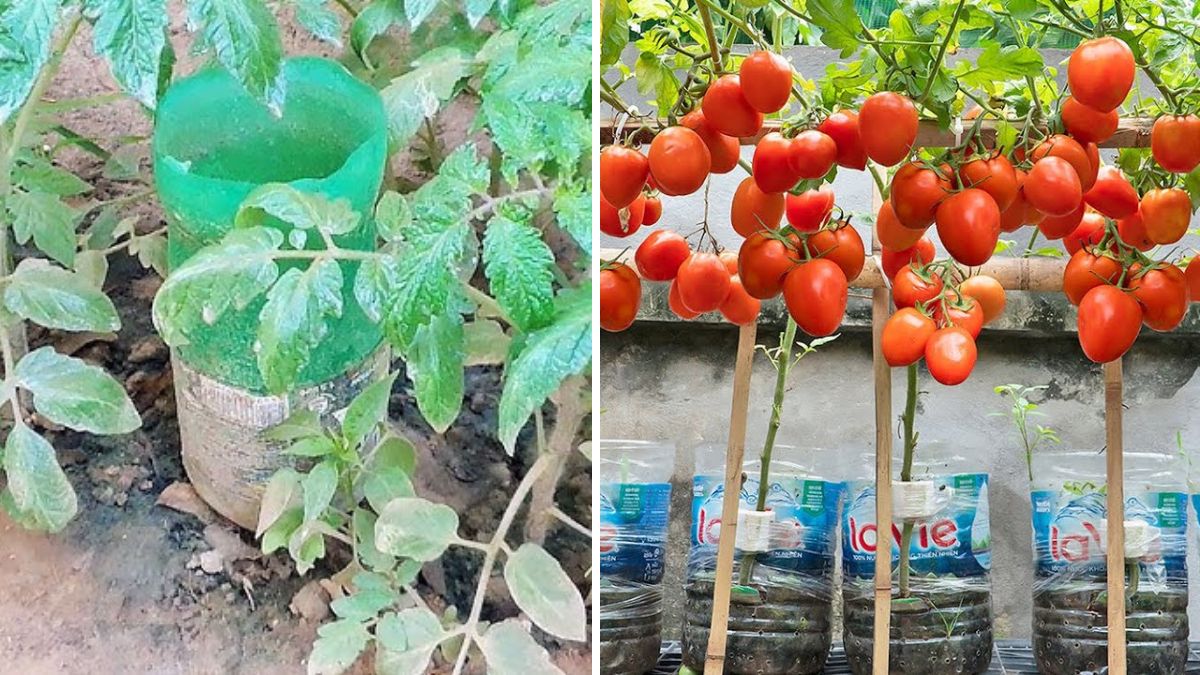
✂️ Step 1: Prepare the Plastic Bottle
You can use your bottle in two ways:
Method 1: Vertical Bottle Pot (Most Common)
- Take a 2L or 5L bottle.
- Cut off the upper portion (like creating a wide opening).
- Make 4–6 drainage holes at the bottom.
- Add a thin layer of gravel to improve drainage.
Method 2: Hanging Bottle Tomato Planter
If you want a creative look:
- Cut a rectangular opening on the side of the bottle.
- Make holes opposite the opening for hanging with rope.
- Add soil and plant your tomato.
🌱 Step 2: Prepare the Soil Mix
Tomatoes need airy, fertile, well-drained soil.
Recommended Soil Mix (Best for Bottles):
- 40% garden soil
- 30% compost or cow dung manure
- 20% cocopeat
- 10% sand
Add-on Boosters
Mix one handful of any of these for extra growth:
✔ Vermicompost
✔ Wood ash
✔ Mustard cake powder (soaked for 48 hrs)
✔ Crushed eggshell powder
Great soil = healthy tomatoes!
🍅 Step 3: Planting the Tomato
You can start with seeds or seedlings.
Option A: Planting Seeds Directly
- Sprinkle 4–5 tomato seeds on the soil.
- Cover with a thin layer of soil.
- Spray water gently.
- Keep the bottle in a bright place, but no harsh sun until germination.
Germination takes 5–8 days.

When seedlings grow 3–4 inches, keep the strongest one and remove others.
Option B: Using Seedlings (Faster Method)
- Make a hole in the soil.
- Bury the seedling deeper—tomatoes grow roots along buried stems.
- Press soil gently.
- Water thoroughly.
This method gives stronger plants and earlier fruiting.
☀️ Step 4: Light Requirements
Tomatoes love sunlight.
✔ Give 6–8 hours of direct sunlight daily
✔ East/south-facing balconies are perfect
✔ If indoors, use grow lights for 10–12 hours
Plants without enough light become tall, weak, and produce fewer tomatoes.
💧 Step 5: Watering the Bottle Tomato Plant
Watering a bottle plant is easy but must be done correctly.
Rules for Watering Tomatoes in Plastic Bottles:
- Keep the soil slightly moist, not soggy.
- Water from the bottom if you’re using a self-watering design.
- Always check moisture before watering—just touch the soil.
- During flowering and fruiting, increase watering slightly.
Overwatering = root rot
Underwatering = small fruits & flower drop
Balance is key.

🌼 Step 6: Feeding Your Tomato Plant
Tomatoes are heavy feeders, especially in small containers.
Feed every 10–15 days with:
✔ Vermicompost tea
✔ Mustard cake liquid fertilizer
✔ Banana peel fertilizer
✔ Epsom salt (once a month)
✔ Seaweed liquid fertilizer
Best Schedule (Simple & Effective)
- Day 1: Vermicompost tea
- Day 15: Banana peel fertilizer
- Day 30: Mustard cake water
- Day 45: Epsom salt (½ tsp per litre)
Repeat this cycle.
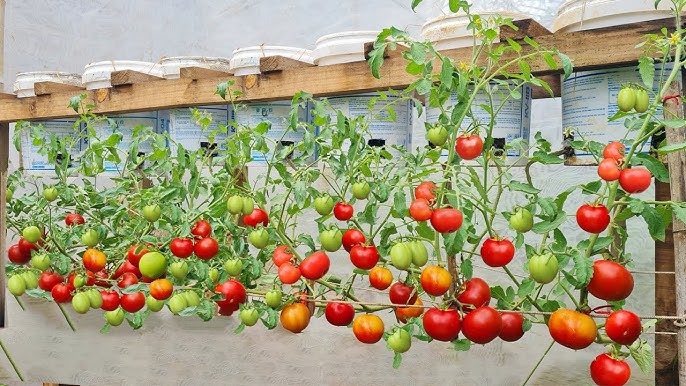
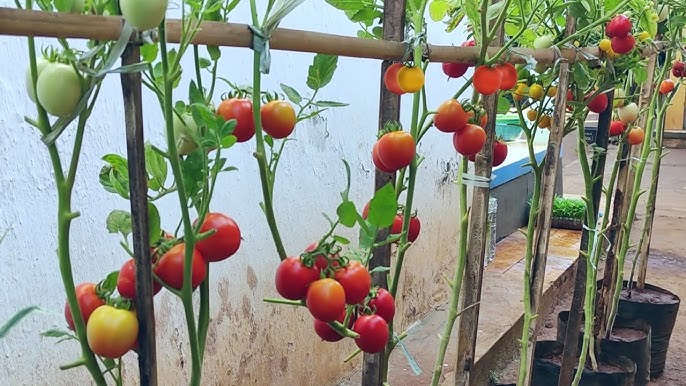
🌿 Step 7: Support and Pruning
Even though the plant is grown in a bottle, give it proper structure.
Use Support
Insert a wooden stick or bamboo piece into the bottle.
Tie the plant gently with thread or clips.
Pruning Tips
- Remove small, weak branches.
- Cut off suckers (side shoots) between main stems.
- Remove old yellow leaves.
This directs energy to fruit production.
🐛 Step 8: Protect From Pests and Diseases
Common tomato pests:
- Aphids
- Whiteflies
- Caterpillars
- Fungal diseases
Natural Pest Solutions:
✔ Neem oil spray (weekly)
✔ Soap water spray for aphids
✔ Garlic-chilli spray for whiteflies
✔ Keep plant airy and clean

Avoid chemical pesticides for indoor plants.
🍅 Step 9: Flowering and Fruiting Stage
When flowers appear:
- Give more sunlight
- Increase potassium (banana peel fertilizer works best)
- Keep soil evenly moist
- Avoid touching flowers (tomatoes self-pollinate)
For better pollination, shake the bottle gently once a day.
Soon, tiny green tomatoes will appear—they will grow and turn red!
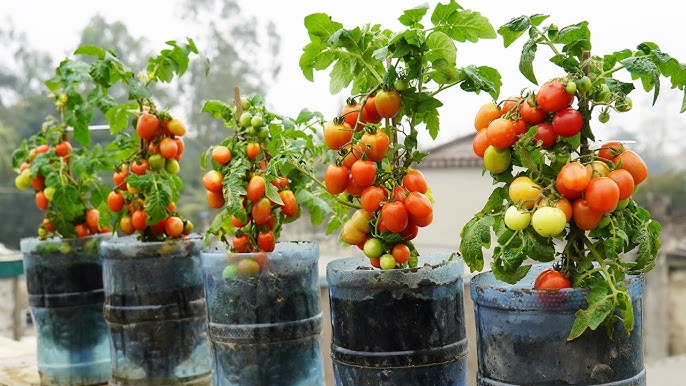
🌟 Harvest Time!
Depending on the variety, tomatoes are ready in 60–80 days.
Signs your tomatoes are ready:
- Smooth skin
- Full red or orange color
- Slightly soft when pressed
- Fruity aroma
Always pick carefully by twisting, not pulling.
💡 Pro Tips for Extra Success
🔥 Use cherry tomatoes—they grow best in bottles.
🔥 Add mulch (dry leaves) to prevent water evaporation.
🔥 Don’t keep the bottle in extreme heat—it warms roots too much.
🔥 Use two bottles for a bigger plant.
🔥 Replace the topsoil every month with fresh compost.
🧃 Bonus: Make a Self-Watering Bottle System
- Cut the bottle into two halves.
- Insert the top half upside-down like a funnel.
- Add a cloth wick through the bottle cap.
- Fill bottom half with water.
- Fill top with soil and plant your tomato.
Now your plant waters itself for days!

🌱 Final Words: Anyone Can Grow Tomatoes in a Bottle!
Growing tomatoes in plastic bottles is not just a gardening trick—it’s a smart, space-saving, eco-friendly method anyone can do. Whether you’re a beginner or an experienced gardener, this simple setup will give you fresh, juicy, homegrown tomatoes right in your home.
Try it once, and you’ll want to grow more bottles of tomatoes all year long!
If you want, I can also create:
✅ YouTube script
✅ Facebook post
✅ Instagram caption
✅ Pinterest pin description
✅ Another 1200-word article on any plant
Just tell me!