With urban spaces shrinking and the need for fresh, home-grown food increasing, gardeners around the world are turning to creative, space-saving solutions. One of the most innovative and eco-friendly methods gaining popularity is PET bottle gardening. These simple plastic bottles, often discarded as waste, can become highly productive mini-gardens when used correctly. Whether you’re growing herbs on a balcony, leafy greens by a window, or even creating vertical food walls, PET bottle gardening is a practical, sustainable way to cultivate plants in limited spaces.
This comprehensive 1200-word guide will walk you through everything you need to know—from preparing bottles and selecting plants to watering, fertilizing, and creating stunning vertical systems. By the end, you’ll be able to transform plastic waste into a lush, productive garden.
1. What Is PET Bottle Gardening and Why Try It?
PET bottle gardening is the practice of growing plants inside recycled plastic bottles. This upcycling method is ideal for:
- Small balconies
- Kitchen windows
- Walls
- Rooftops
- Indoor gardens
Benefits of PET Bottle Gardening
✔ Eco-friendly: Reduces plastic waste
✔ Budget-friendly: Replaces expensive pots
✔ Space-saving: Ideal for vertical or hanging systems
✔ Water-efficient: PET bottles retain moisture better
✔ Customizable: You can design them in many shapes and sizes
This gardening method proves that you don’t need a big yard—or even pots—to grow fresh vegetables at home.
2. Choosing the Right PET Bottles
Not all bottles are equal when it comes to gardening.
Best Bottle Sizes
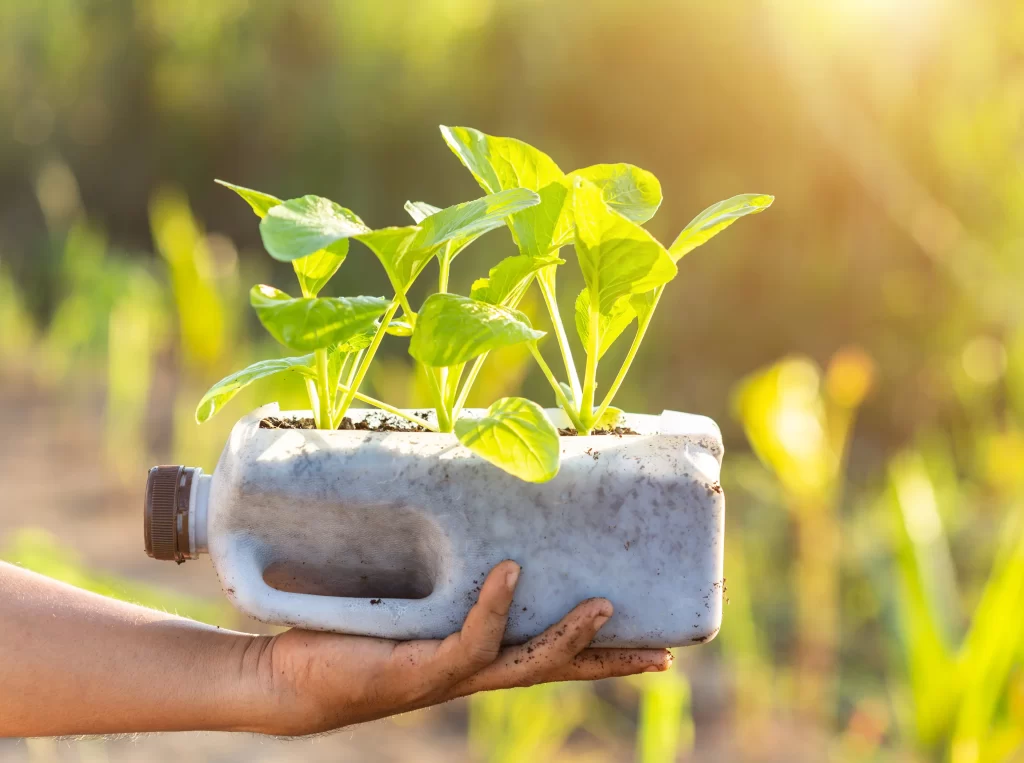
- 1–2 liter bottles: Perfect for herbs, leafy greens, onions, small flowers
- 5 liter or larger bottles: Suitable for tomatoes, peppers, cucumbers, potatoes
- Transparent bottles: Allow you to see root growth but can cause algae
- Colored bottles: Block sunlight, reducing algae development
Tip: If using clear bottles, wrap the lower portion with paper or cloth to protect roots from direct sunlight.

3. Preparing Bottles for Planting
How you cut and prepare the bottle depends on the type of system you want to build.
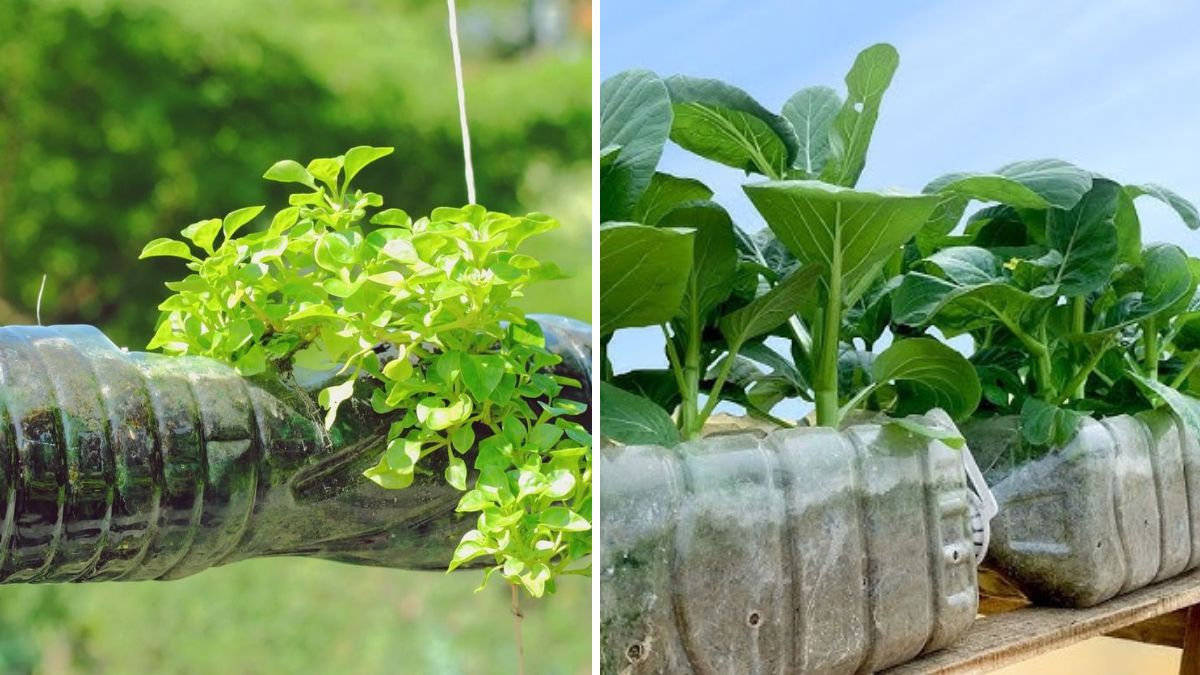
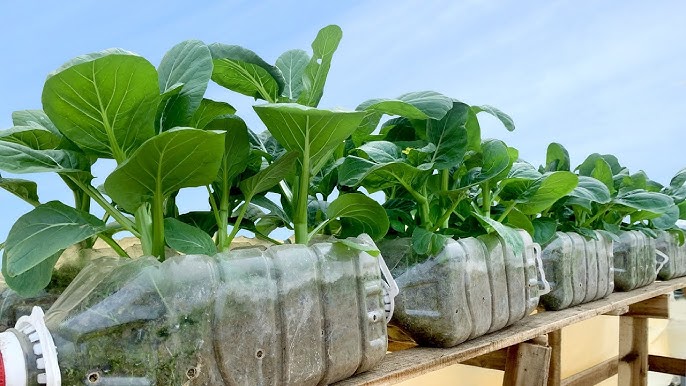
A. Horizontal PET Bottle Planter (for leafy greens & herbs)
- Lay the bottle sideways.
- Cut a rectangular opening on the top.
- Make drainage holes on the bottom.
- Fill with potting mix and plant seeds or seedlings.
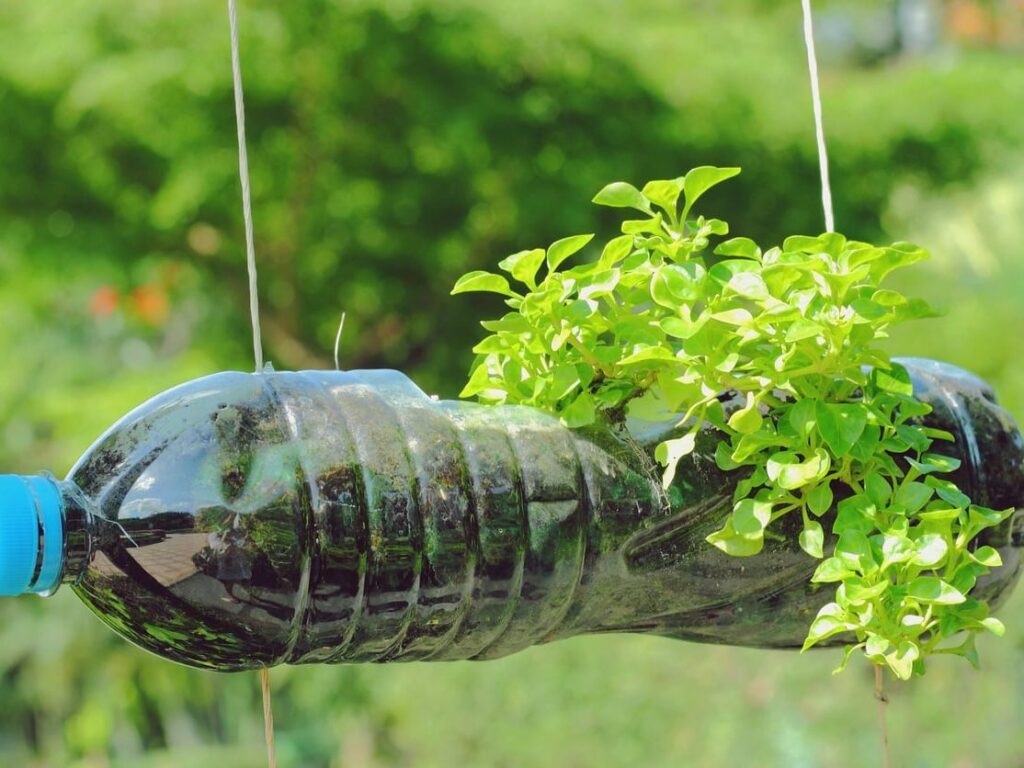
B. Vertical Hanging PET Bottle (for strawberries, basils, mint)
- Cut a hole on the side of the bottle.
- Make two small holes opposite each other near the top.
- Insert a rope or wire to hang the bottle.
- Add soil and plant.
C. Self-Watering PET Bottle System
This is one of the most efficient designs.
Steps:
- Cut the bottle into two halves.
- Invert the top half into the bottom half.
- Insert a cotton wick through the bottle cap.
- Fill the bottom with water and top section with soil.
- Plant seeds in the top half.
The wick constantly draws water, keeping the soil perfectly moist.
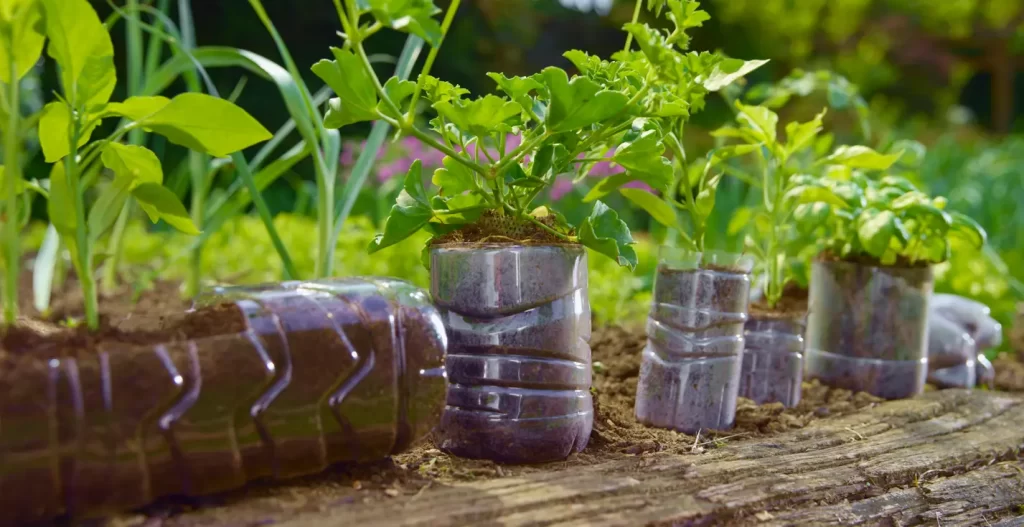
D. Vertical PET Bottle Tower (for a full wall garden)
- Cut side openings along several bottles.
- Thread a rope or metal rod through the bottles.
- Stack multiple bottles vertically.
- Fill each with soil and plant leafy greens, onions, herbs.
This method can hold 10–50 plants in a tiny space, making it a favorite for balcony gardeners.
4. Choosing the Best Soil Mix for PET Bottle Gardens
Because bottles have limited space, you must use a light, nutrient-rich mix.
Recommended Soil Mix:
- 40% coco peat or coir
- 30% compost or vermicompost
- 20% garden soil
- 10% sand or perlite
Why this works:
✔ Good drainage
✔ Lightweight
✔ Prevents root rot
✔ Nutrient-rich
✔ Keeps roots aerated
Avoid using garden soil alone—it becomes compact in bottles and suffocates the roots.

5. Best Plants to Grow in PET Bottles
Many plants thrive in bottles if given proper care.
A. Easy plants for beginners
- Mint
- Basil
- Coriander
- Spinach
- Lettuce
- Green onions
- Aloe vera
- Succulents
B. Plants for larger bottles
- Tomatoes (dwarf varieties)
- Chilli peppers
- Okra
- Potatoes (in 5L bottles)
- Cucumbers (with support)
C. Flowers that do well
- Marigold
- Petunia
- Pansy
- Calendula
Plants to Avoid
- Large trees
- Plants with deep taproots (carrots, beets) unless using very large bottles
- Plants that need lots of soil (pumpkins, melons)
6. Planting Techniques for Success
When planting in PET bottles:
- Keep the soil loose
- Do not overfill with soil; roots need space
- Water after planting
- Place the bottle in a sunny location
Seed Planting
- Make small holes (1–2 cm)
- Drop 2–3 seeds
- Cover lightly
- Keep moist until germination
Seedling Transplanting
- Dig a small hole
- Place seedling carefully
- Cover with soil
- Press gently
- Water lightly
7. Watering Your PET Bottle Garden
Watering in PET bottles must be managed carefully.
General Rules:
- Water when the top 2 cm of soil feels dry
- Ensure proper drainage
- Avoid overwatering—roots can rot quickly
Self-Watering Bottle System Advantage
This system prevents:
✔ Overwatering
✔ Dry soil
✔ Water wastage
Plants draw water as needed, making it ideal for busy gardeners.
8. Fertilizing PET Bottle Plants
Since the soil quantity is small, nutrients get used up fast.
Fertilizers to Use:
- Vermicompost
- Compost tea
- Seaweed extract
- Banana peel fertilizer
- Eggshell powder (for calcium)
- Cow dung compost (well-decomposed)
Feeding Schedule
- Feed every 15 days for leafy vegetables
- Every 20–25 days for fruiting plants
- Spray liquid fertilizers weekly
Avoid chemical fertilizers—bottle gardens are better suited for organic growing.

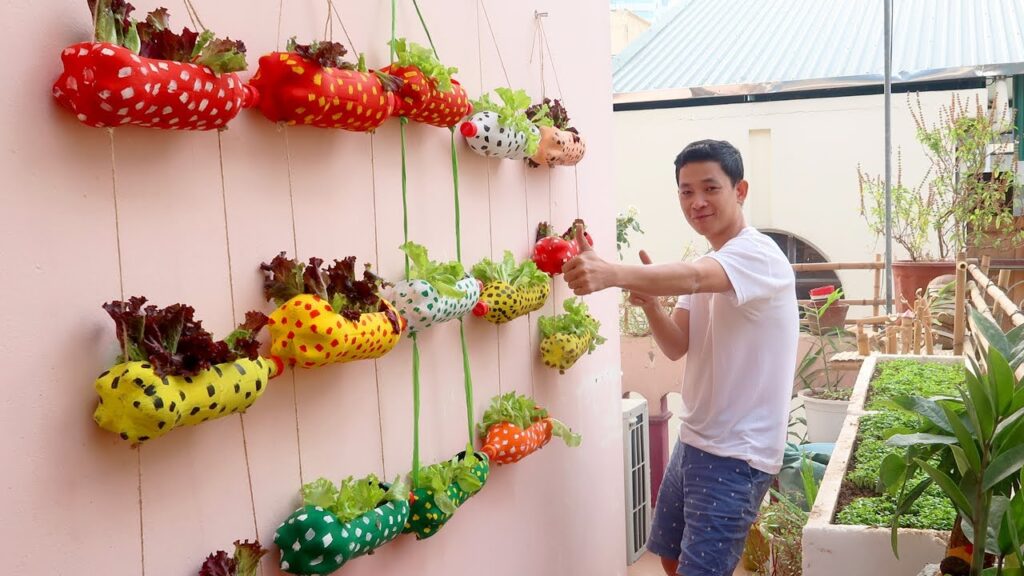
9. Creating a Vertical Wall Garden with PET Bottles
A vertical garden is not only productive but also decorative.
How to build one:
- Collect 10–20 bottles.
- Cut holes for planting.
- Create a frame using wood or metal grid.
- Attach bottles using zip ties or screws.
- Fill with soil.
- Plant herbs or greens.
Best plants for vertical walls
- Mint
- Lettuce
- Spinach
- Cilantro
- Thyme
- Strawberries
Vertical gardens maximize limited space while enhancing the beauty of your home.
10. Lighting Requirements
Most vegetables need:
- 4–6 hours of sunlight for herbs and leafy greens
- 6–8 hours for tomatoes, peppers, and fruiting plants
If indoors, consider using a small LED grow light.
11. Pest Control in PET Bottle Gardens
Common pests include:
- Aphids
- Mealybugs
- Whiteflies
- Caterpillars
Organic pest control:
- Neem oil spray (weekly)
- Soap + water spray
- Garlic chili spray
- Keep plants well-spaced
Because bottles dry quickly, avoid keeping leaves wet for long periods.
12. Common Problems and Solutions
1. Yellow leaves
Cause: Overwatering or nutrient deficiency
Fix: Improve drainage, add compost

2. Mold or algae in bottles
Cause: Excess moisture, sunlight on roots
Fix: Reduce watering, wrap bottle with cloth
3. Stunted growth
Cause: Poor soil aeration
Fix: Add perlite or sand
4. Drooping plants
Cause: Heat stress or dry soil
Fix: Move to partial shade, water regularly
13. Harvesting Your Bottle Garden
Most leafy greens are ready in:
- 25–40 days
Herbs can be harvested continuously.
Tomatoes, peppers, and cucumbers will fruit normally when grown in larger bottles with proper support.
Conclusion
PET bottle gardening is a simple, sustainable, and highly rewarding way to grow your own vegetables and herbs. With just a few bottles, good soil, sunlight, and consistent care, you can transform your living space into a productive green garden. Whether you build a vertical wall, a self-watering system, or a hanging herb garden, PET bottle gardening offers endless creativity and functionality.

If you’d like, I can also create:
- A YouTube video script
- A Pinterest-style infographic