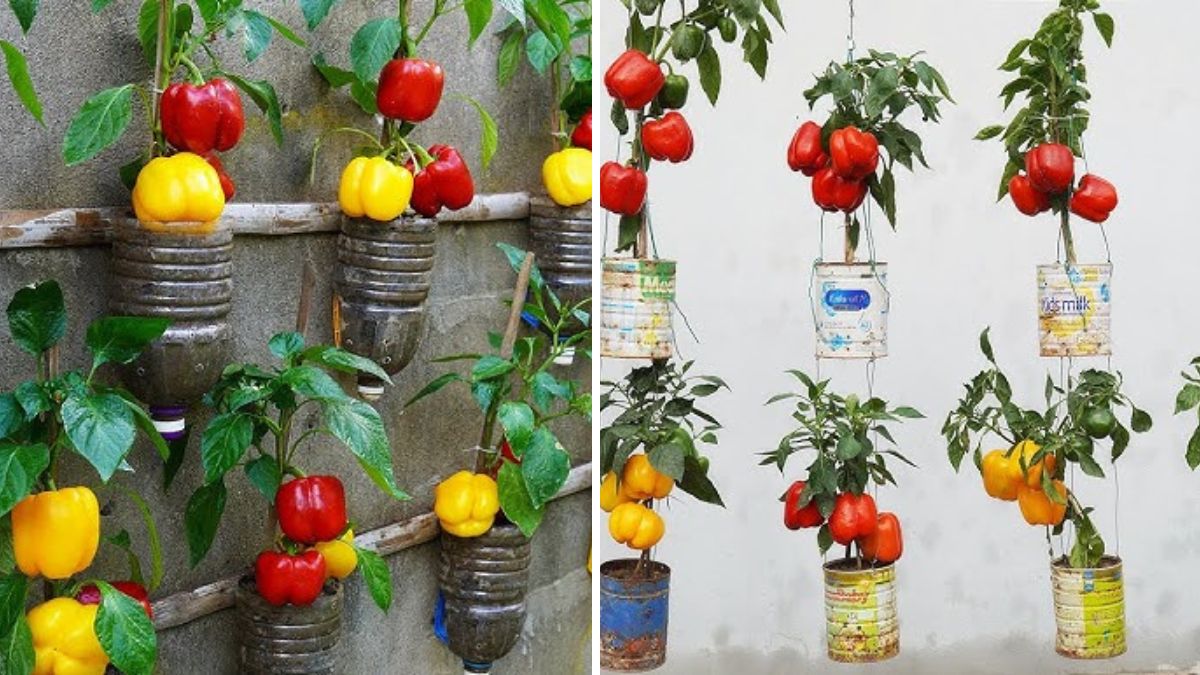
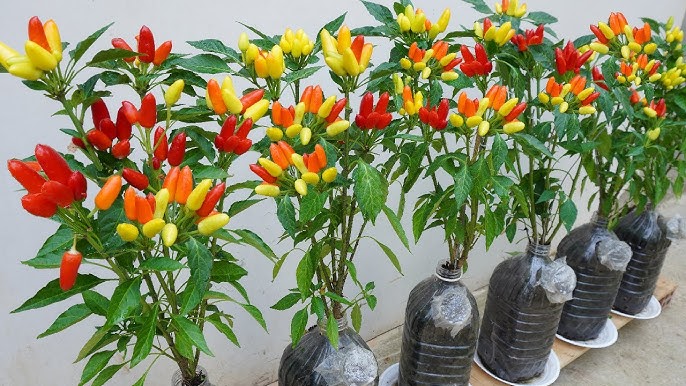
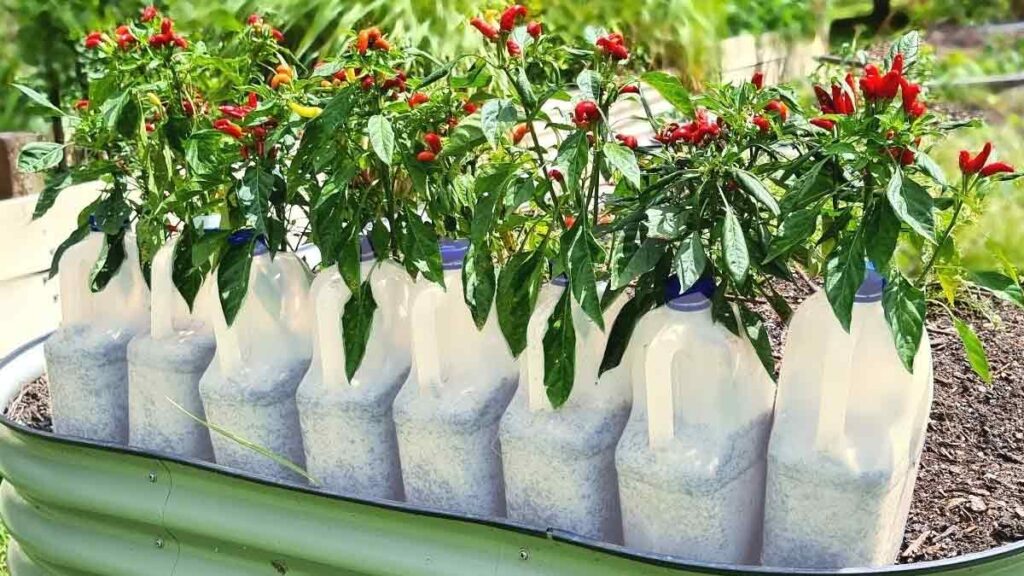
Growing peppers at home is incredibly rewarding, especially when you discover simple and inexpensive methods that don’t require a large garden. One of the most creative and space-saving methods is growing peppers in plastic bottles. This DIY technique is perfect for urban gardeners, balcony setups, small spaces, and anyone who loves recycling with purpose. With the right approach, plastic bottles can transform into efficient mini-planters that help you produce lush pepper plants and plentiful harvests.
This guide will teach you everything you need to know—from choosing the right bottles and preparing them, to sowing seeds, caring for the plants, and harvesting delicious peppers. Let’s get started building your bottle pepper garden!
1. Why Grow Peppers in Plastic Bottles?
Growing peppers in plastic bottles offers many benefits, especially for beginners or small-space gardeners:
✔ Zero waste gardening
Plastic bottles that usually end up in landfills become practical containers for planting.
✔ Perfect for small spaces
Peppers don’t require very deep pots, making plastic bottles an ideal fit for balconies, windowsills, and patios.
✔ Controlled environment
Plastic bottles help you manage soil quality, drainage, and watering with ease.
✔ Low cost
You can grow multiple pepper plants with almost no investment in pots or planters.
✔ Portable
Move them around easily to give your plants the best sunlight.

This method is sustainable, accessible, and surprisingly effective.
2. Choosing the Right Plastic Bottles
Not all plastic bottles are equally suitable. Here’s what works best:
✓ 2-liter soda bottles
The perfect size for pepper roots.
✓ 5-liter water bottles
Ideal for larger pepper varieties or stronger root development.
✓ Juice or oil containers
Useful for creating self-watering planter systems.
Avoid small 500 ml bottles because they don’t provide enough soil depth or moisture retention.
3. Preparing the Plastic Bottle Planter
You can prepare your bottle in two common ways:
Method 1: Vertical Bottle Planter
- Wash and dry the bottle thoroughly.
- Cut the top quarter off the bottle.
- Poke drainage holes at the bottom using a hot nail or knife.
- Flip the cut top upside down to create a funnel (optional).
- Fill with good-quality potting soil.
This is great for beginners and allows easy transplanting later.

Method 2: Self-Watering Bottle System
- Cut the bottle in half.
- Insert the top half upside down inside the bottom half.
- Add a cotton rope or shoelace through the cap to act as a wick.
- Fill the top half with soil.
- Fill the bottom with water.
This system gives your peppers a constant moisture supply—perfect for hot climates.
4. Choosing Pepper Seeds
Peppers grow well in containers, but some varieties are especially suitable for bottle gardening:
Best compact varieties:
- Thai chili
- Jalapeño
- Bird’s eye chili
- Mini bell pepper
- Tabasco pepper
- Cayenne
Avoid giant varieties
Large bell peppers or long sweet peppers need deeper pots and more root space.
5. The Right Soil Mix for Peppers
Peppers thrive in loose, fertile, and well-draining soil.
Recommended mix:
- 40% garden soil or cocopeat
- 40% compost or vermicompost
- 20% perlite, sand, or rice husk for drainage
Optional boosters:
- A handful of crushed eggshells
- One tablespoon of neem cake
- A little bio-enzyme to enrich soil microbes
Healthy soil is the foundation of a productive bottle garden.
6. Sowing Pepper Seeds in Plastic Bottles
You can start seeds directly in bottles or germinate them separately and transplant later.
Steps for direct sowing:
- Fill the bottle with prepared soil.
- Moisten the soil lightly.
- Sow 2–3 seeds about ½ inch deep.
- Cover lightly with soil.
- Keep the bottle in a warm area (peppers love heat).
Seeds germinate in 7–14 days under the right conditions.
Temperature requirement:
Peppers germinate best at 25–30°C (77–86°F).

If multiple seeds sprout, keep the strongest seedling and remove the others.
7. Transplanting Seedlings into Bottles
If you start seeds in trays:
- Wait until seedlings have 2–3 true leaves.
- Make a hole in the bottle soil using your finger.
- Gently transplant without disturbing the roots.
- Water well after transplanting.
Transplanting helps you choose the healthiest and strongest plants.
8. Sunlight Requirements
Peppers grown in bottles need plenty of sunlight:
✔ 6–8 hours of direct sunlight daily
If you live in a very hot region:
- Use shade nets during peak afternoon heat.
- Move bottles to a cooler spot when needed.
Proper sunlight strengthens stems and increases fruit production.
9. Watering Peppers in Plastic Bottles
Watering needs to be managed carefully because bottle planters dry out faster.
How to water:
- Water deeply until excess water drains out.
- Avoid watering too often—pepper roots dislike soggy soil.
- In self-watering bottles, refill the reservoir every 3–5 days.
Signs of underwatering:
- Drooping leaves
- Dry, cracked soil
Signs of overwatering:
- Yellowing leaves
- Mushy stems
- Fungal growth
Peppers prefer slightly dry soil between waterings.

10. Feeding and Fertilizing Bottle-Grown Peppers
Because bottle planters contain limited soil, nutrients must be replenished regularly.
Best fertilizers for peppers:
- Compost tea
- Banana peel water (potassium)
- Fish emulsion
- Seaweed extract
- Vermicompost
Feeding schedule:
- Every 10–15 days during growing season
- Increase potassium and phosphorus when flowers appear
- Reduce nitrogen once fruits begin developing
Healthy nutrition = larger yield and stronger plants.
11. Supporting Growth and Flowering
Peppers need good airflow and proper support to grow well in bottles.
Tips:
- Keep bottles slightly spaced apart.
- Add a small stick to support the main stem.
- Prune lower leaves to improve airflow.
- Remove early flower buds to allow stronger plant growth.
A well-shaped pepper plant produces more fruit.
12. Pest and Disease Management
Bottle gardening reduces soil-borne diseases, but pests can still appear.
Common pepper pests:
- Aphids
- Whiteflies
- Spider mites
- Caterpillars
Natural solutions:
- Neem oil spray
- Soap water spray
- Garlic-chili spray
- Regular pruning of infected leaves
Prevent fungal issues:
- Ensure good drainage
- Avoid overwatering
- Keep leaves dry
Healthy management leads to problem-free growth.
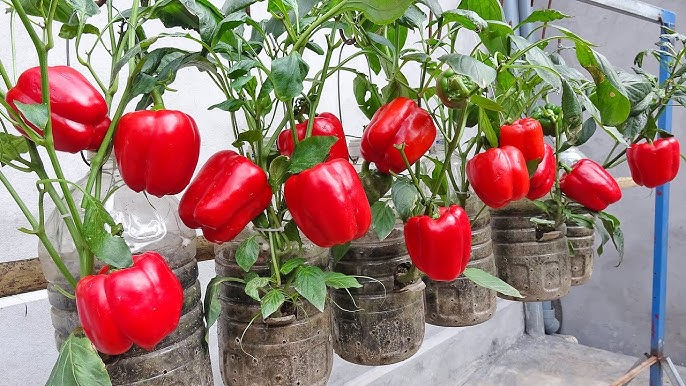
13. Harvesting Bottle-Grown Peppers
Most pepper varieties are ready to harvest in 60–90 days from transplanting.
Signs your peppers are ready:
- Firm texture
- Deep color
- Smooth skin
- Full size for the variety
Cut peppers using scissors or sharp pruners, never pull—pulling can damage the plant.

Peppers will continue to produce more fruits after each harvest.
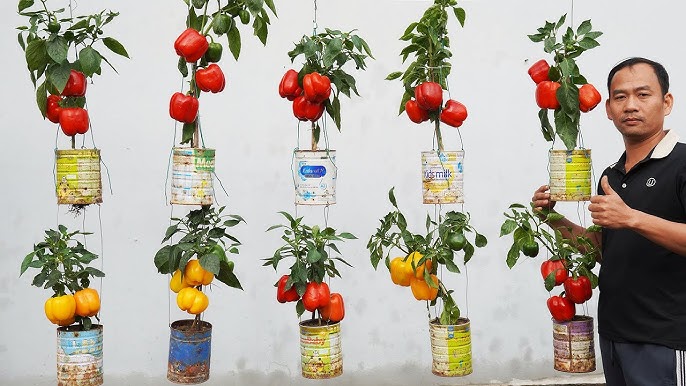
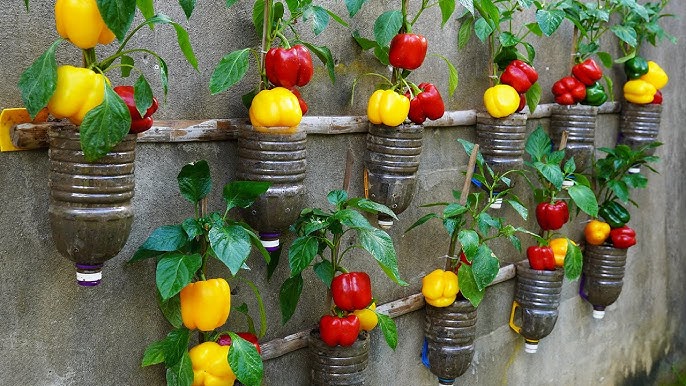
14. Advantages of Growing Peppers in Bottles
- Saves space
- Encourages recycling
- Easy to move and track sunlight
- Lower risk of weeds
- Perfect for beginners
- Great school or home gardening project
You’ll be amazed how much harvest you can get from a simple plastic bottle garden!
15. Conclusion
Growing peppers in plastic bottles is a fun, affordable, and highly productive gardening method. With just a handful of materials and a little care, you can grow healthy pepper plants that produce delicious fruits right on your balcony, windowsill, or patio.
From choosing the right bottle and preparing the soil to watering, fertilizing, and harvesting, this method is simple yet incredibly effective. Bottle gardening helps save space, reduces waste, and gives you complete control over your plant’s growing environment.
Whether you’re a beginner or an experienced gardener, bottle-grown peppers are a rewarding addition to your home garden. Start with one bottle—then watch your mini pepper farm grow!